Author: Mahmoud Salih
Date: January 18, 2026
This guide provides a complete walkthrough for setting up your online course website as an administrator. Subsequent sections of the documentation will cover instructor-specific features and student-facing functionalities to create a comprehensive e-learning platform.
Preliminary Step: Admin Account Setup
Before beginning the course website setup, ensure you have admin privileges:
- Access the website at https://web.devad.io/
- Click “Login” in the top navigation
- Verify admin access by checking for the admin dashboard menu on the left sidebar
- You should now see “Course Management,” “Settings,”
Step 1: Selecting the Appropriate Theme
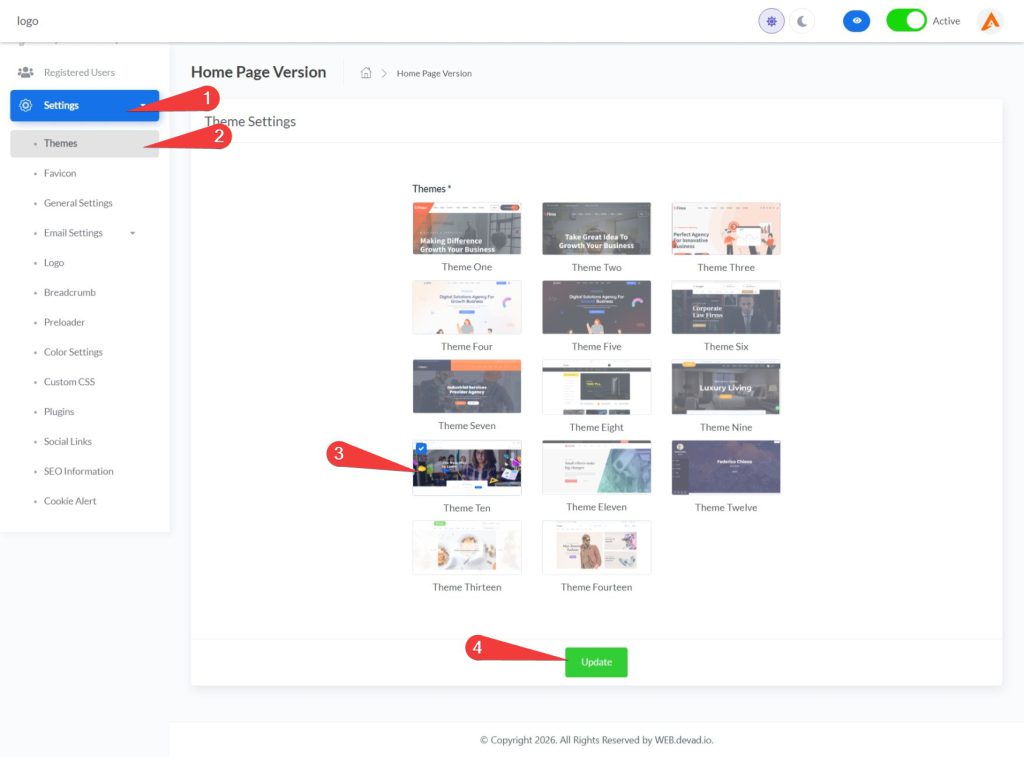
- Click on “Settings” in the left sidebar menu to expand the sub-menu options
- From the expanded settings sub-menu, select “Themes” to display the theme configuration panel
- Choose “Theme Ten” (specifically designed for course websites) by clicking on it
- Click the “Update” button to apply your selection
- Upon successful theme activation, a progress notification will appear in the top-left corner confirming the successful theme change
Step 2: Instructor Management
Path 1: Adding a New Instructor
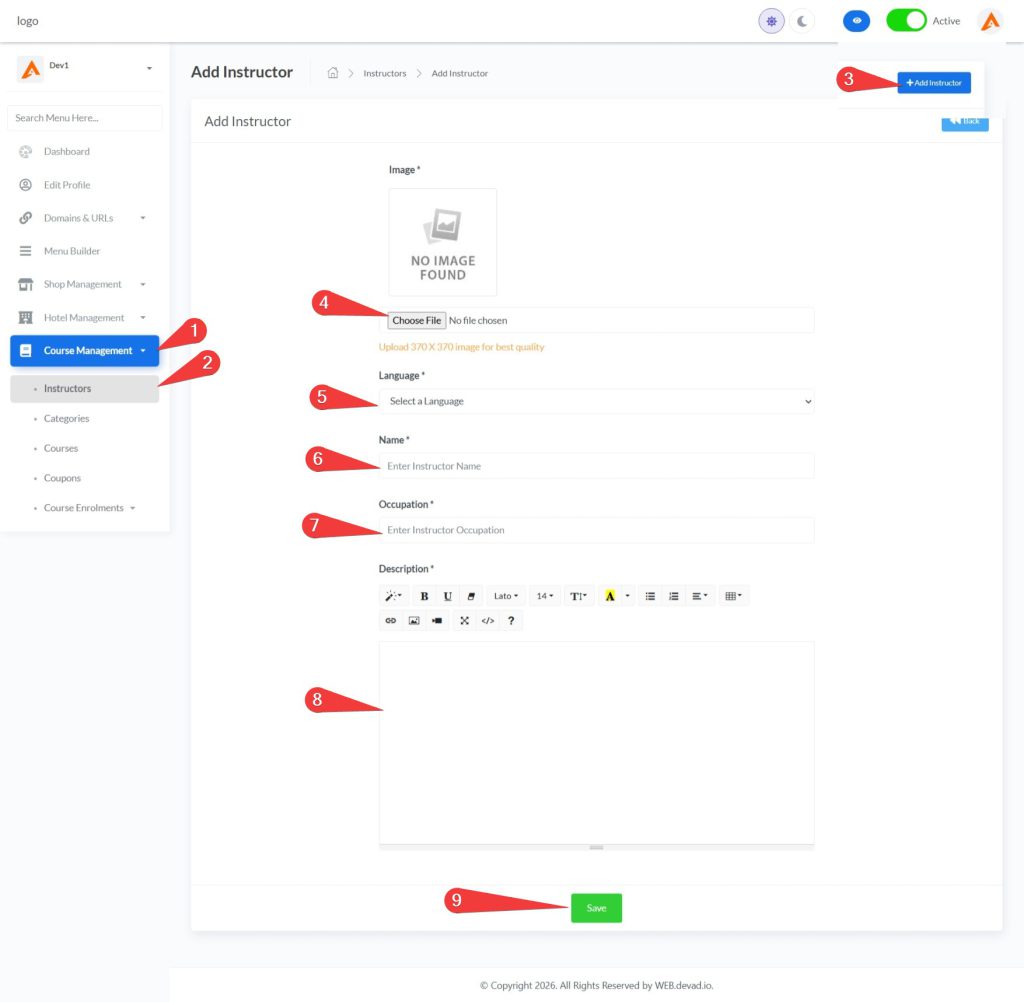
- Click “Course Management” in the left sidebar menu
- Select “Instructors” from the expanded sub-menu
- Click the “+Add Instructor” button to open the instructor creation form
- Click “Choose File” and upload a high-quality profile image (370 × 370 pixels recommended)
- Select the instructor’s primary language from the dropdown menu
- Enter the instructor’s full name in the “Name” field
- Specify the instructor’s professional title or specialty in the “Occupation” field
- Provide a comprehensive professional bio in the description field (minimum 30 characters)
- Click the “Save” button to create the instructor profile
Path 2: Viewing Instructor List

- Navigate to Course Management > Instructors
- Use the language dropdown to filter instructors by language
- Review instructor details including profile image, name, and occupation in the main table
- Use the search functionality to find specific instructors if needed
Path 3: Editing Instructor Details
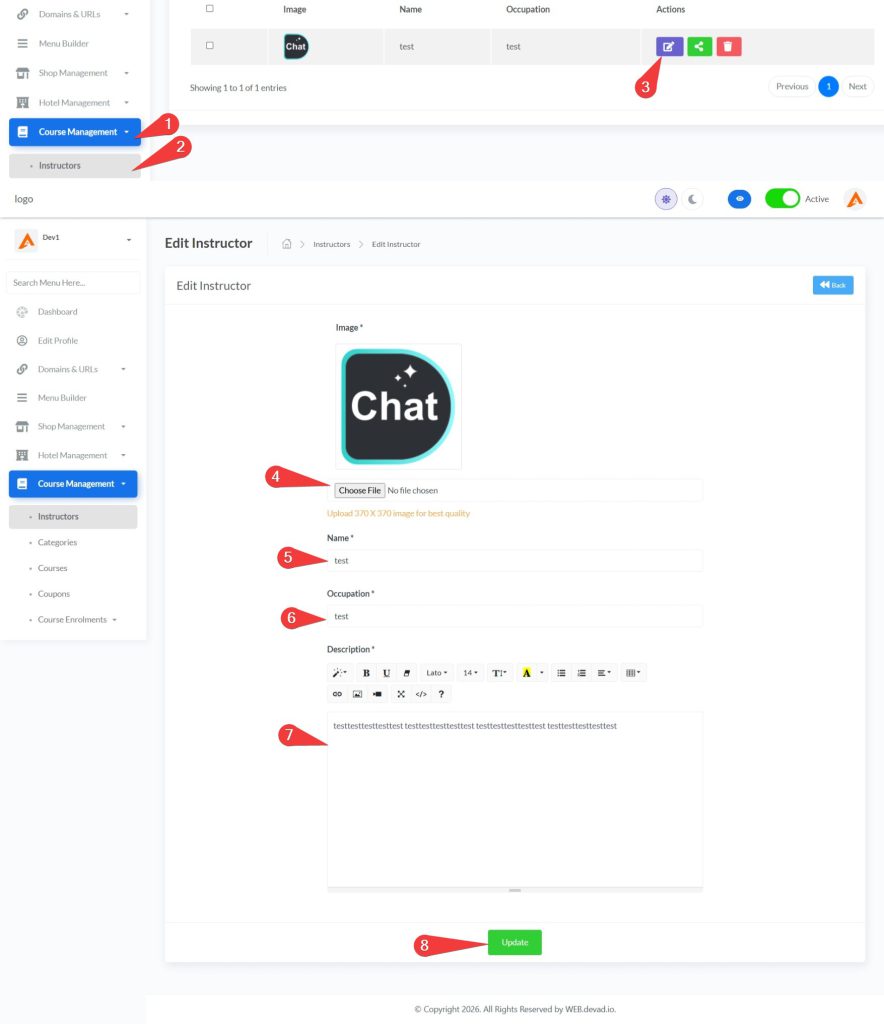
- From the instructors list, click the edit icon for the instructor to modify
- Update the profile image by selecting a new 370×370 pixel file
- Edit the instructor’s name, professional title, or description as needed
- Click the “Update” button to save changes
- Confirm successful update via the notification in the top-right corner
Path 4: Managing Instructor Social Links & Deletion
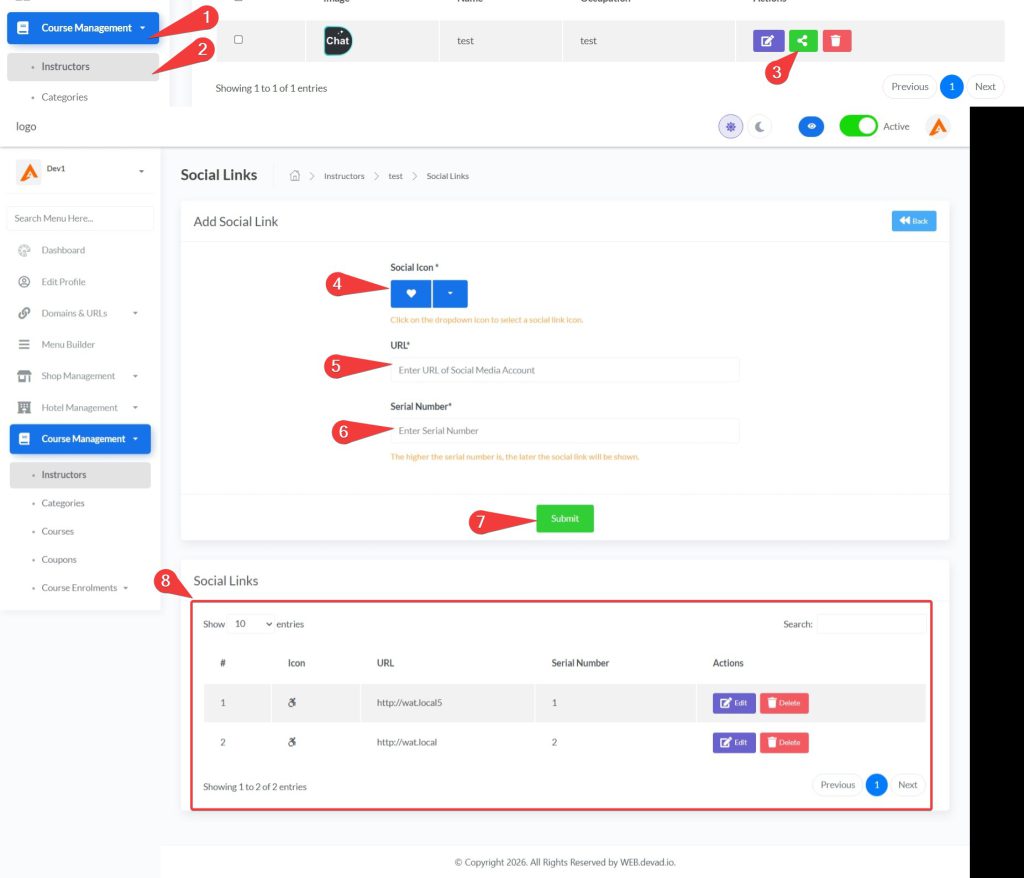
- To add social media links:
- Click the social media icon for the desired instructor
- Select an appropriate icon from the dropdown menu
- Enter the social media profile URL
- Input a serial number to determine display order
- Click “Submit”
- you can view all social media accounts that related to the selected instructor bellow there.

- To delete an instructor:
- Click the trash icon in the Actions column and confirm
- For bulk deletion: Check multiple instructors and click the “Delete” button which will appear beside +add instructor button
Step 3: Category Management
Path 1: Adding New Categories
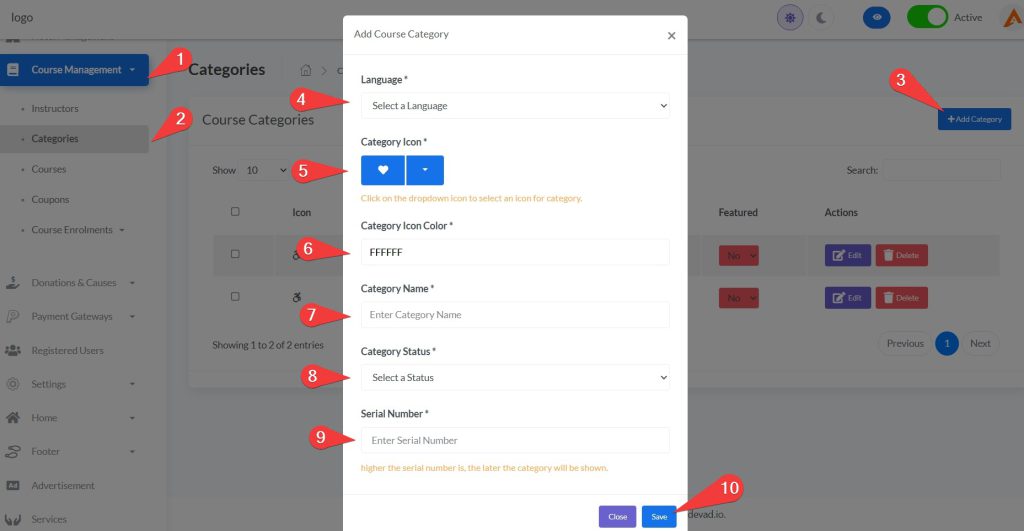
- Navigate to Course Management > Categories
- Click “+Add Category” in the top-right section
- In the creation modal:
- Select language from the dropdown menu
- Choose an appropriate icon using the icon picker
- Select an icon color using the color picker
- Enter the category name
- Set status (Active/Deactive)
- Enter a serial number to determine display order (higher numbers appear later)
- Click “Save” to create the category
Path 2: Viewing Course Categories
- Navigate to Course Management > Categories
- Use the language dropdown to filter categories by language
- Review category details including icons, names, status, and serial numbers
- Use search functionality and pagination to navigate through categories
Path 3: Editing Existing Categories
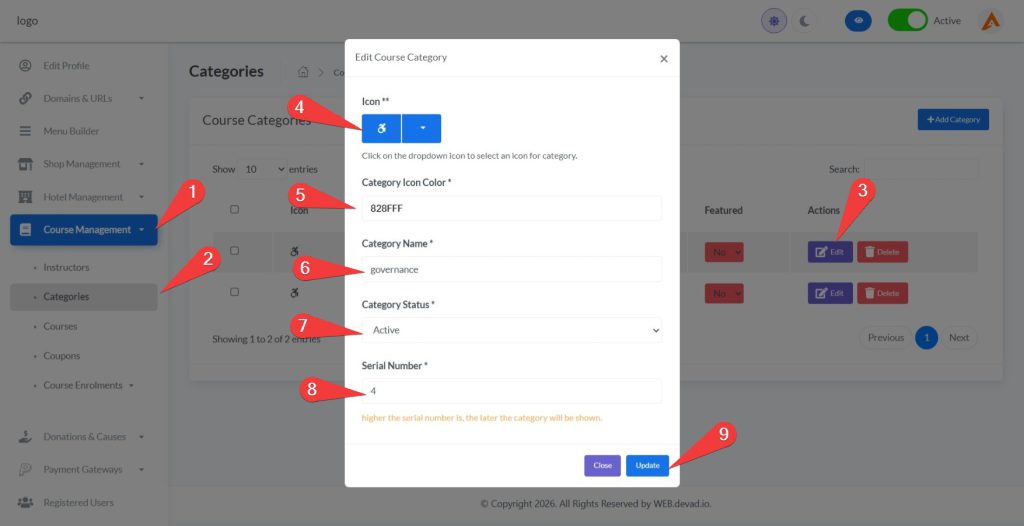
- From the categories list, click the “Edit” button next to your target category
- In the edit modal:
- Update the category icon and color as needed
- Modify the category name
- Update status between “Active” and “Deactive”
- Adjust the serial number to change display position
- Click “Update” to save changes
Path 4: Managing Category Status & Deletion

- To set featured status:
- Use the “Featured” dropdown in the categories table
- Select “Yes” to feature prominently or “No” to remove featured status
- For deletion:
- Click the “Delete” button next to the target category and confirm
- For bulk deletion: Check multiple categories and click the “Delete” button
Step 4: Course Management
Path 1: Adding a New Course
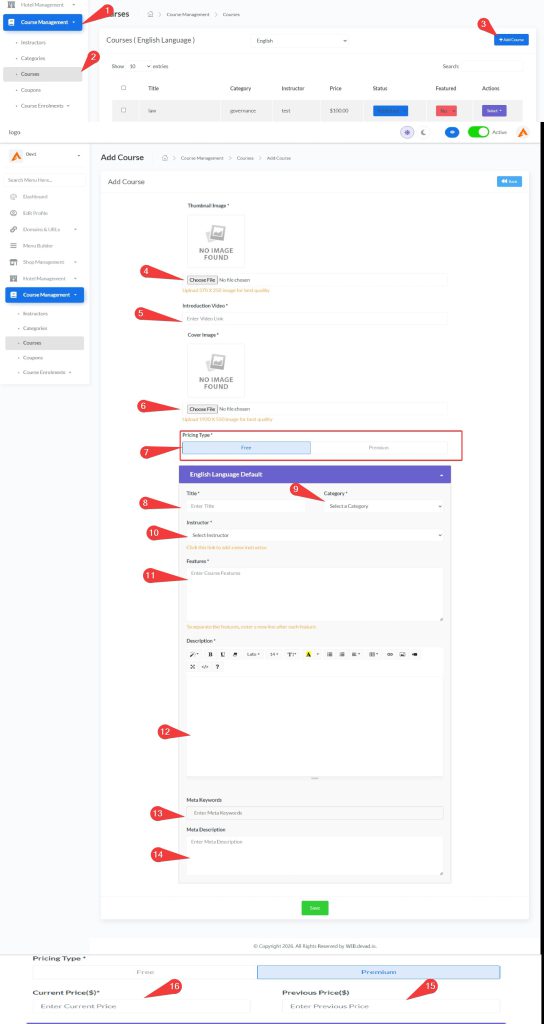
- Navigate to Course Management > Courses
- Click “+Add Course” to open the creation form
- Set up course media and pricing:
- Upload a thumbnail image (370×250 pixels)
- Add an introduction video URL (YouTube/Vimeo)
- Upload a cover image (1920×550 pixels)
- Select pricing type (Free or Premium)
- For premium courses: set current and previous prices
- Enter course details:
- Enter the course title
- Select a category and instructor
- List course features (one per line)
- Write a detailed description
- Add meta keywords and description for SEO
- Click “Save” to create the course
Path 2: Editing Existing Courses
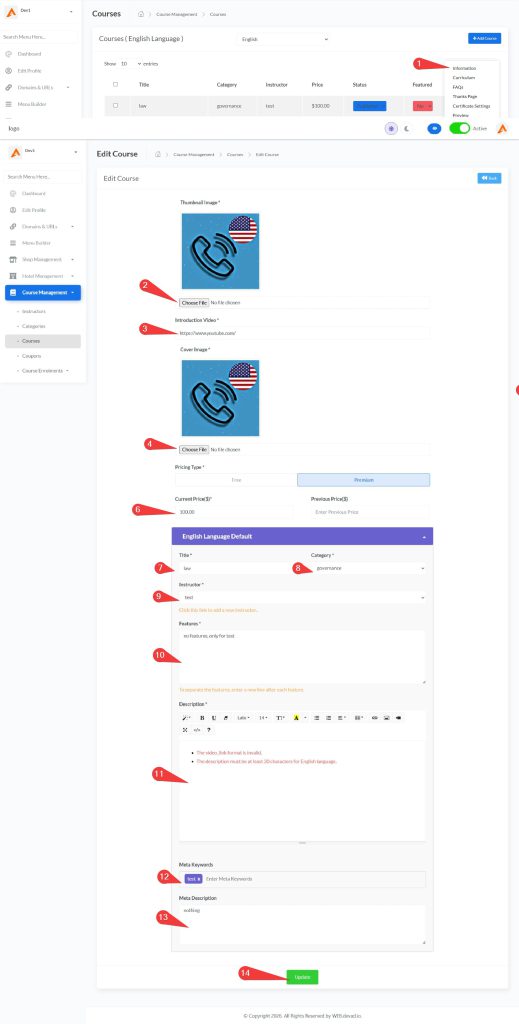
- From the courses table, click the “Select” dropdown in the Actions column
- Choose “Information” to access the course editing interface
- Update course media, pricing, and details as needed
- Click “Update” to save changes
Path 3: Course Module Management (Detailed)
The curriculum management system allows instructors to organize course content into structured learning paths using modules and lessons. This hierarchical structure helps students navigate complex topics systematically.
Part 1: Accessing Module Management
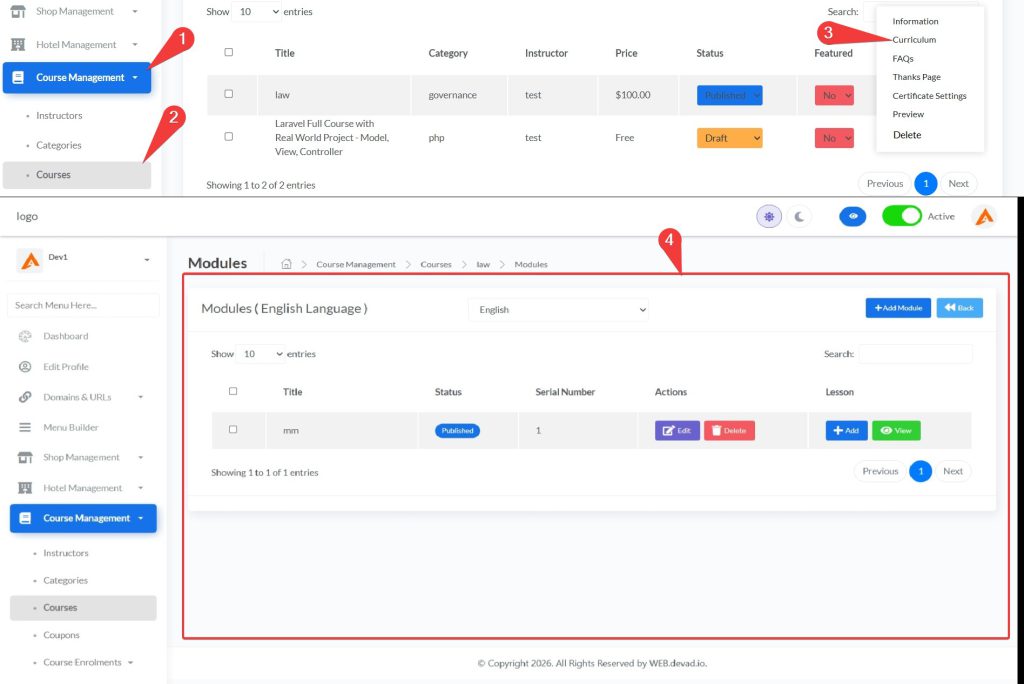
- Click “Course Management” in the left sidebar menu
- Select “Courses” from the expanded submenu
- Locate your target course (e.g., “law”) in the courses table
- Click the “Select” dropdown button in the Actions column
- Choose “Curriculum” from the dropdown options to access the module management page
- The breadcrumb navigation at the top confirms your path: Home > Course Management > Courses > [Course Name] > Modules
Part 2: Module Management Interface
The modules management page displays:
- Language Selector:
- Dropdown to view modules in different languages
- Default language is marked with “(Default)”
- Module Table Columns:
- Checkbox column for bulk operations
- Title column showing module names
- Status column indicating publication state (Published/Draft)
- Serial Number column determining display order
- Actions column with Edit and Delete options
- Lesson column with options to manage lessons within the module
- Action Buttons:
- “Back” button to return to courses list
- “+Add Module” button to create new modules
- “Delete” button for bulk module deletion (appears when checkboxes are selected)
Part 3: Adding New Modules
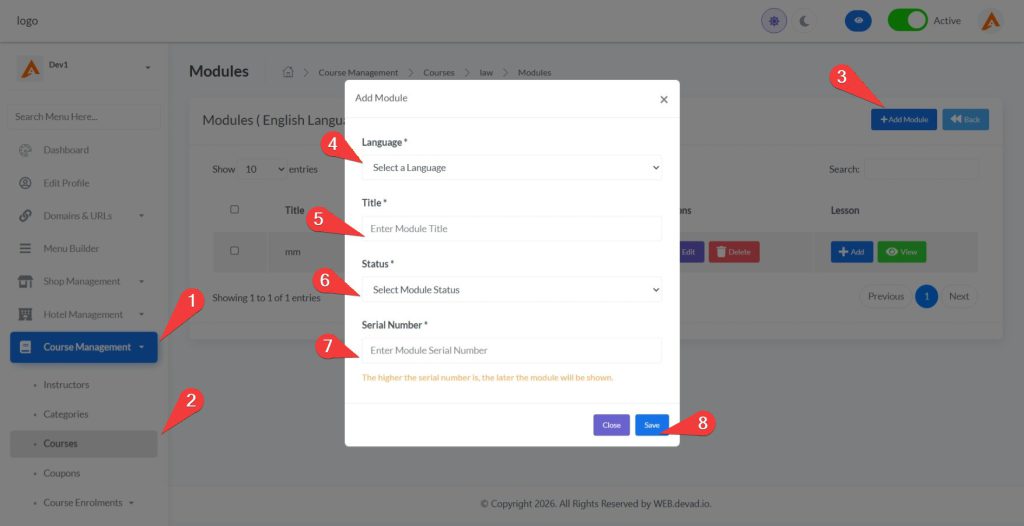
- Click the “+Add Module” button in the top-right section
- In the module creation modal, complete these fields:
- Language: Select the language for this module from the dropdown
- Title: Enter a descriptive module name (e.g., “Introduction to Legal Systems”)
- Status: Choose between:
- “Draft” – Module is hidden from students
- “Published” – Module is visible to enrolled students
- Serial Number: Enter a display order number:
- Lower numbers appear first in the course curriculum
- Higher numbers appear later in the course sequence
- Click the “Save” button to create the module
- Verify successful creation when the module appears in the modules list
Part 4: Managing Lessons Within Modules
Each module contains its own set of lessons. To manage lessons:
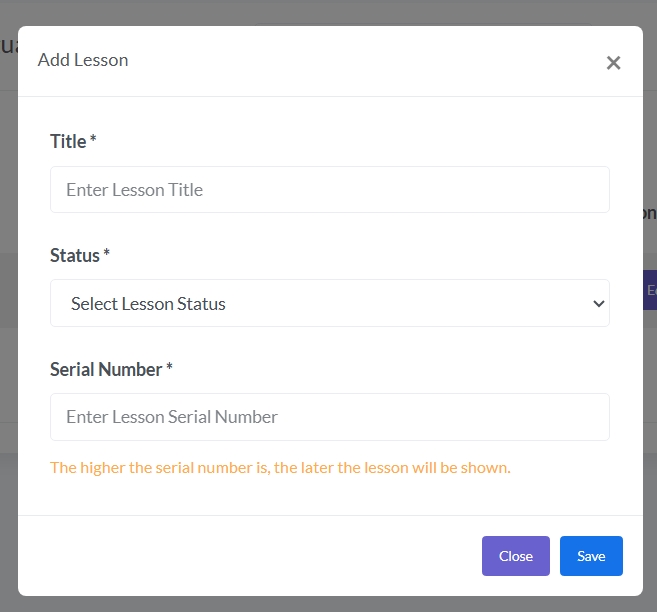
- Adding Lessons:
- Click the “Add” button in the Lesson column for your target module
- In the lesson creation modal:
- Enter lesson title (e.g., “Fundamentals of Law”)
- Set status (Draft/Published)
- Enter serial number to determine display order within the module
- Click “Save” to create the lesson
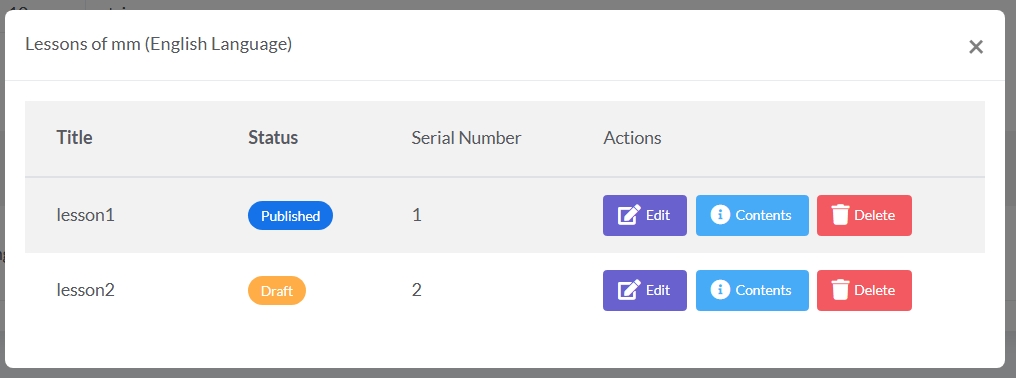
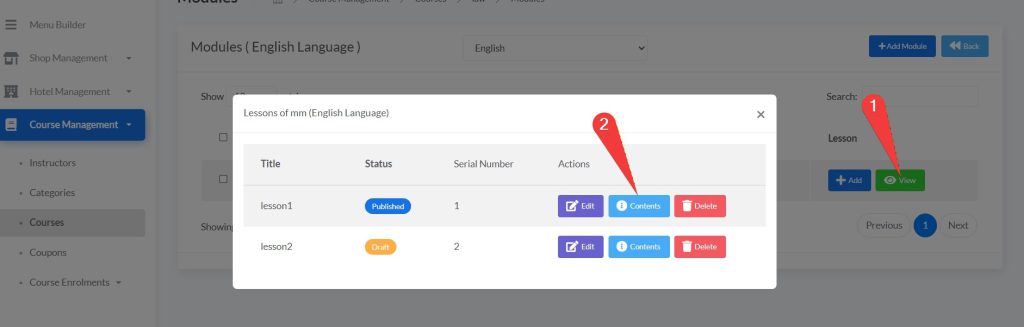
- Viewing Lessons:
- Click the “View” button in the Lesson column to see all lessons in that module
- The modal displays lesson details including title, status, and serial number
- Use the “Add” button within this view to create additional lessons
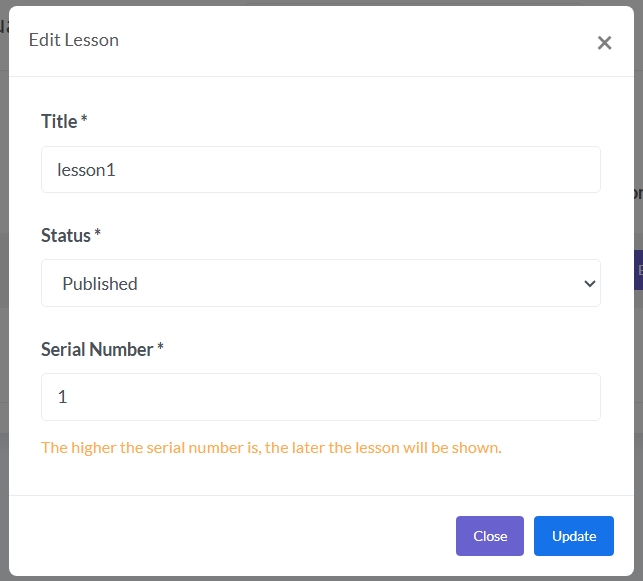
- Editing Lessons:
- From the lesson view modal, click the edit icon next to any lesson
- Update lesson title, status, or serial number as needed
- Click “Update” to save changes
- Lesson Organization Best Practices:
- Use sequential serial numbers (1, 2, 3…) for logical learning progression
- Group related concepts within the same module
- Set appropriate status for lessons under development (Draft) versus ready content (Published)
Accessing Lesson Content Management
Follow these steps to access the lesson content management page:
- Log in to https://web.devad.io/ as admin
- Navigate to Course Management > Courses
- Find your course and click the “Select” dropdown in Actions column
- Choose “Curriculum” to access module management
- Click on a module to view its lessons
- Click on a specific lesson then click view button then on “Contents” to access content management page
- Verify your navigation path in the breadcrumbs: Home > Course Management > Courses > [Course Name] > Modules > [Module Name] > [Lesson Name]
Adding Different Content Types
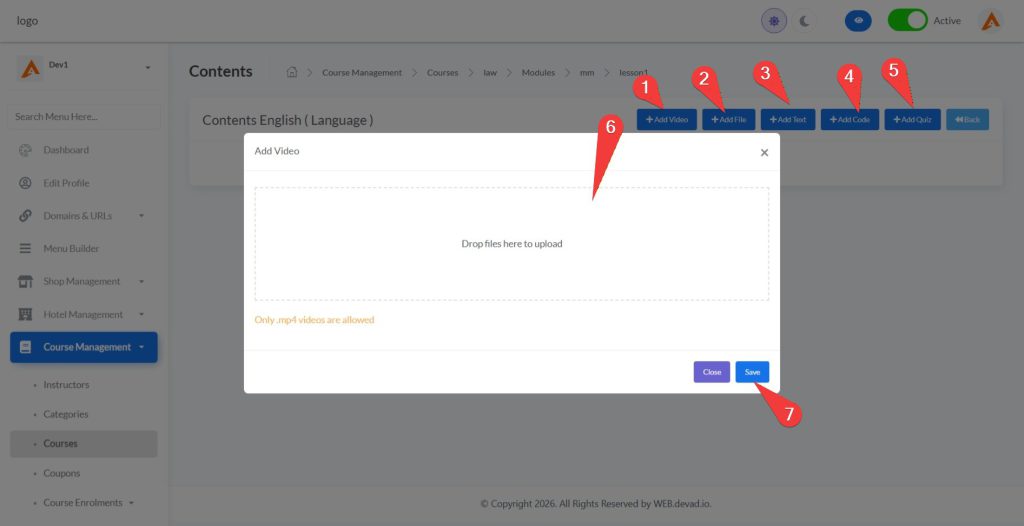
The lesson content page provides five content creation options:
Adding Videos:
- Click the “+Add Video” button
- Upload an MP4 video file using the drag-and-drop interface
- Supported format: .mp4 only
- The system automatically processes and optimizes video for streaming
- Click “Save” to add the video to your lesson
Adding Files:
- Click the “+Add File” button
- Upload supplementary materials using the file uploader
- Supported formats: .txt, .doc, .docx, .pdf, and .zip
- Students can download these files during their learning journey
- Click “Save” to add the file to your lesson
Adding Text:
- Click the “+Add Text” button
- Use the rich text editor (Summernote) to create formatted content
- Features include text styling, lists, tables, images, and embedded media
- Create comprehensive lesson descriptions, instructions, or reading materials
- Click “Save” to add the text content to your lesson
Adding Code:
- Click the “+Add Code” button
- Enter programming code in the dedicated code editor window
- Suitable for coding courses, algorithm explanations, or technical demonstrations
- Code will be displayed with syntax highlighting for better readability
- Click “Save” to add the code block to your lesson
Adding Quizzes:
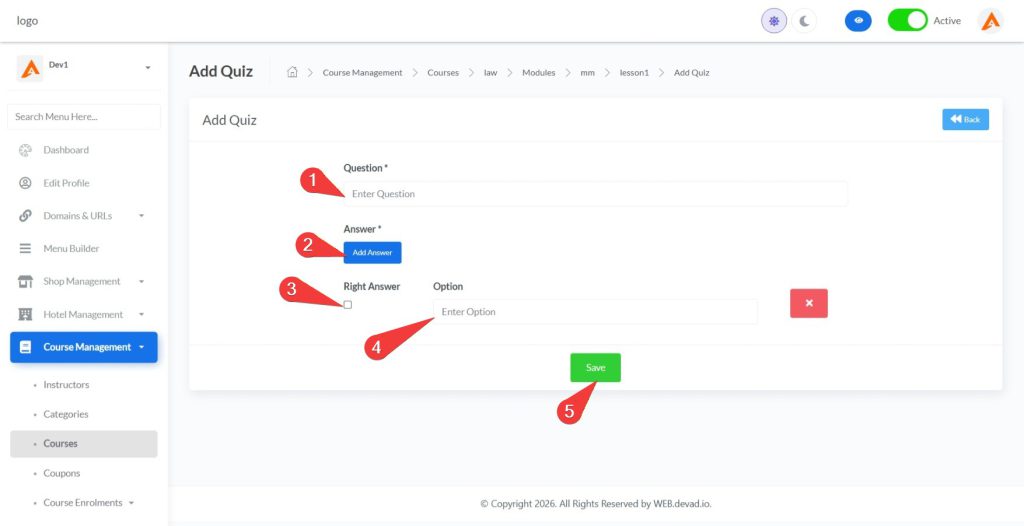
- Click the “+Add Quiz” button
- Enter your quiz question in the designated field
- Click “Add Answer” to create answer options
- Check the “Right Answer” checkbox for correct options
- Add as many answer options as needed
- Remove unnecessary options using the delete button
- Click “Save” to add the quiz to your lesson
Managing Existing Content
After adding content to your lesson:
Content Organization:
- Content appears in the order it was added
- Use the drag-and-drop interface (when available) to reorder content elements
- Group related content types together for logical learning flow
Editing Existing Content:
- Click the edit icon next to any content item
- For text content: Make changes in the rich editor and click “Update”
- For code blocks: Modify the code and click “Update”
- Videos and files require deletion and re-upload for modifications
Deleting Content:
- Click the delete icon next to any content item
- Confirm deletion when prompted
- Deleted content cannot be recovered, so exercise caution
Creating Effective Quizzes
Quizzes are powerful assessment tools. Create effective quizzes by:
Crafting Clear Questions:
- Write questions that directly test learning objectives
- Avoid ambiguous wording or double negatives
- Keep questions concise and focused
Designing Quality Answer Options:
- Provide 3-5 answer choices for multiple choice questions
- Ensure distractors (incorrect options) are plausible but clearly wrong
- For multi-select questions, clearly indicate how many correct answers exist
Setting Up Quiz Parameters:
- Determine the minimum score required to pass the quiz
- Decide if students can retake quizzes and how many attempts they get
- Consider making quizzes either graded or practice-only depending on their purpose
Connecting to Learning Outcomes:
- Align quiz questions with specific learning objectives
- Use quiz results to identify areas where students struggle
- Adjust course content based on quiz performance data
Note: Content organization significantly impacts student learning. Follow a logical sequence: introduce concepts with video or text, provide supplementary materials as files, demonstrate practical applications with code examples, and assess understanding with quizzes.
Part 5: Editing and Deleting Modules
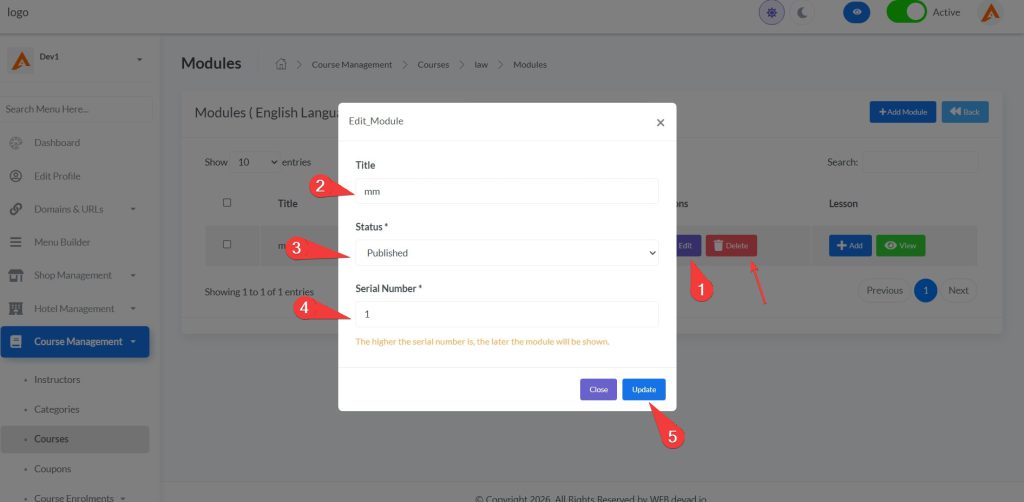
- Editing Existing Modules:
- Click the “Edit” button in the Actions column for your target module
- In the edit modal:
- Update the module title as needed
- Change status between Draft and Published
- Adjust serial number to change module position in curriculum
- Click “Update” to save changes
- Deleting Modules:
- For single module deletion:
- Click the “Delete” button in the Actions column
- Confirm deletion when prompted (all lessons within the module will be permanently deleted)
- For bulk module deletion:
- Check the boxes next to modules you wish to remove
- Click the “Delete” button that appears in the top-right section
- Confirm bulk deletion when prompted
- For single module deletion:
Note: Module serial numbering creates the course learning path. For example, a course on web development might have modules numbered: 1) HTML Fundamentals, 2) CSS Styling, 3) JavaScript Basics. Within each module, lessons follow their own serial numbering system for detailed content progression.
Path 4: Course Additional Features
Course additional features enhance student experience and provide valuable tools for course management. This section covers three essential features: FAQ management, certificate configuration, and thanks page customization.
1. Managing Course FAQs

FAQs help address common student questions before they enroll, reducing support inquiries and increasing conversion rates.
Accessing FAQ Management:
- Navigate to Course Management > Courses
- Locate your target course in the courses table
- Click the “Select” dropdown button in the Actions column
- Choose “FAQs” from the dropdown options
- Use the language selector to view FAQs in different languages
Adding New FAQs:
- Click the “+Add FAQ” button in the top-right section
- In the FAQ creation modal:
- Select the language for this FAQ from the dropdown menu
- Enter a clear, concise question in the “Question” field
- Provide a comprehensive answer in the text area
- Set a serial number to determine display order (lower numbers appear first)
- Click the “Save” button to create the FAQ
- Verify successful creation when the FAQ appears in the FAQs list
Editing and Deleting FAQs:
- To edit an existing FAQ:
- Click the “Edit” button next to the target FAQ
- Update the question, answer, or serial number as needed
- Click “Update” to save changes
- To delete FAQs:
- For single deletion: Click the “Delete” button and confirm
- For bulk deletion: Check multiple FAQs using the checkboxes, then click the “Delete” button that appears
Best Practice: Create FAQs that address common concerns like course requirements, time commitment, certificate validity, and refund policies. Well-crafted FAQs can significantly improve student confidence and enrollment rates.
2. Configuring Certificate Settings
Certificates provide valuable credentials that students can share on professional networks like LinkedIn, enhancing your course’s perceived value.
Accessing Certificate Settings:
- Navigate to Course Management > Courses
- Locate your target course in the courses table
- Click the “Select” dropdown button in the Actions column
- Choose “Certificate Settings” from the dropdown options
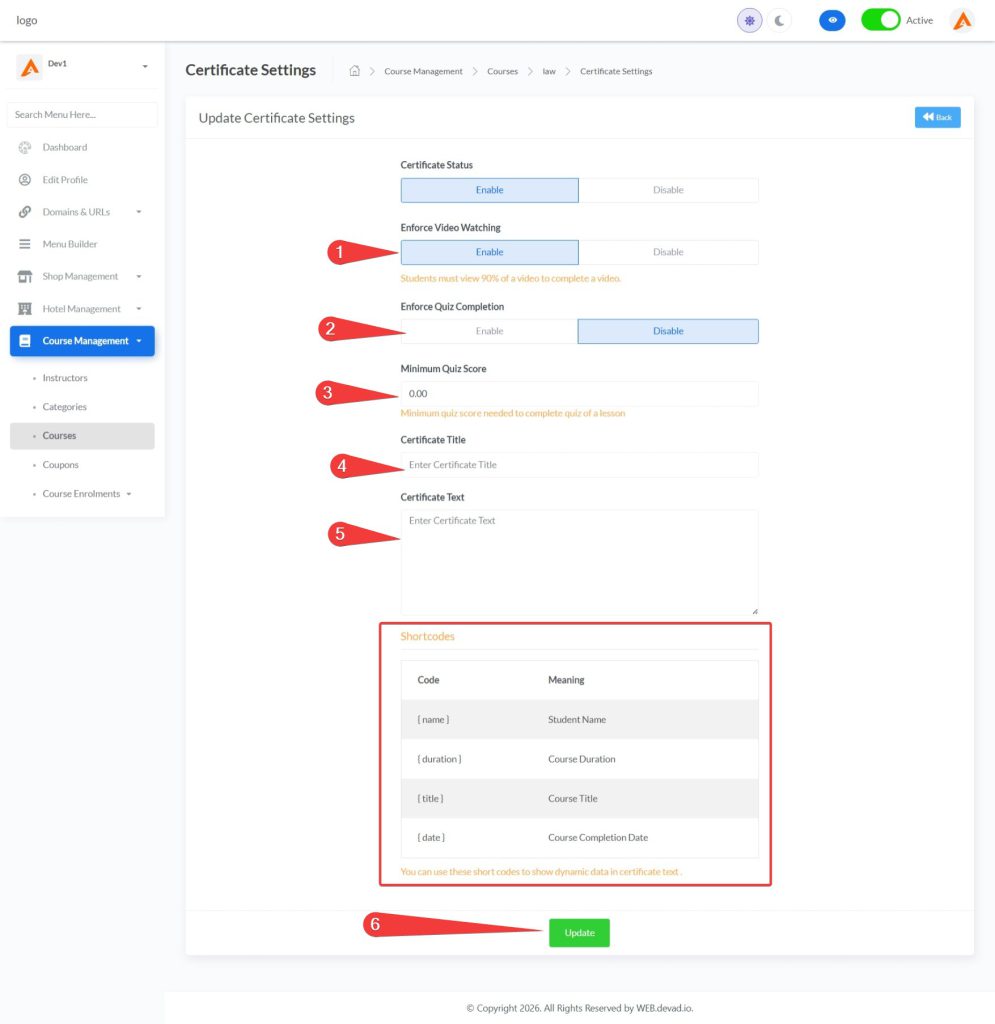
Enabling Certificate Generation:
- Toggle “Certificate Status” to “Enable”
- Configure completion requirements:
- Enforce Video Watching: Enable this to require students to watch 90% of each video before marking it complete
- Enforce Quiz Completion: Enable this to require students to complete all quizzes
- If enabling quiz completion, set the “Minimum Quiz Score” percentage required to pass
Customizing Certificate Content:
- Enter a professional title in the “Certificate Title” field (e.g., “Certificate of Completion”)
- Create personalized certificate text using the available shortcodes:
{name}: Inserts the student’s full name{duration}: Shows the total course duration{title}: Displays the course title{date}: Shows the completion date
- Click “Update” to save your certificate settings
example certificate text:
This certifies that {name} has successfully completed the course "{title}" on {date}.

Total duration: {duration} hours

This achievement demonstrates commitment to professional development and mastery of the subject matter.
3. Editing the Thanks Page
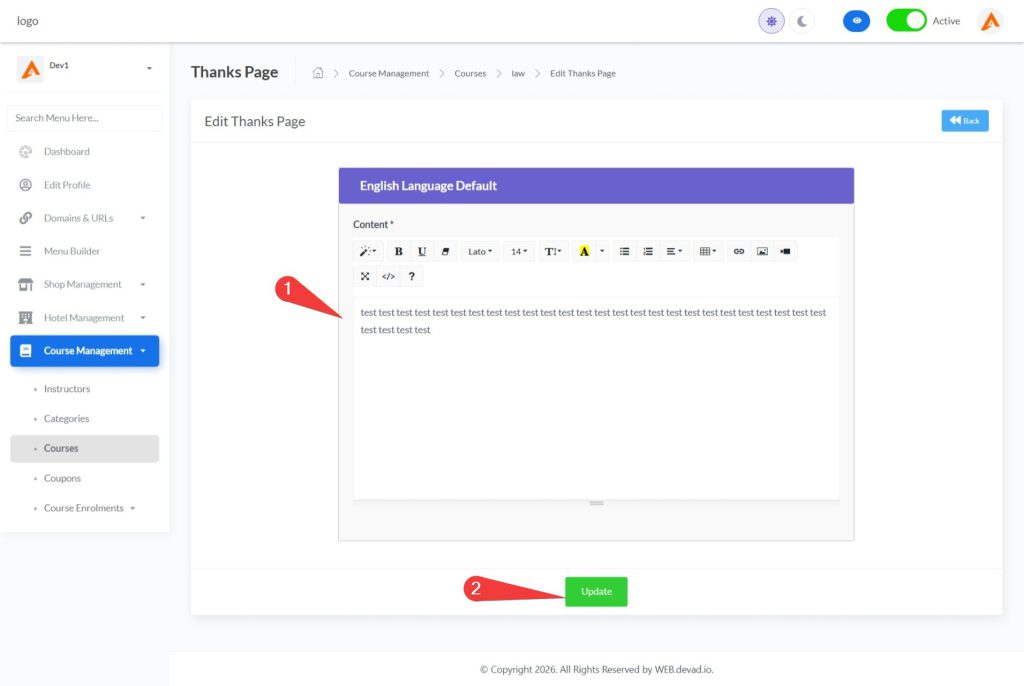
The thanks page is the first impression students receive after enrollment, making it crucial for setting expectations and building excitement.
Accessing Thanks Page Editor:
- Navigate to Course Management > Courses
- Locate your target course in the courses table
- Click the “Select” dropdown button in the Actions column
- Choose “Thanks Page” from the dropdown options
Creating Thanks Page Content:
- Select your preferred language from the accordion headers
- Use the rich text editor to create engaging post-enrollment content:
- Add a personalized thank you message
- Include next steps for course access
- Provide contact information for support inquiries
- Add links to related resources or course materials
- Insert images or media elements to enhance visual appeal
- Format your content using the editor’s text styling options (headings, bold, lists, etc.)
- Click “Update” to save your changes
Multilingual Support:
- Click the language accordion headers to switch between different language versions
- Create unique thanks page content for each supported language
- Maintain consistent messaging across all language versions while adapting to cultural nuances
- Use the “Default” language indicator to identify your primary language version
Step 5: Coupon Management
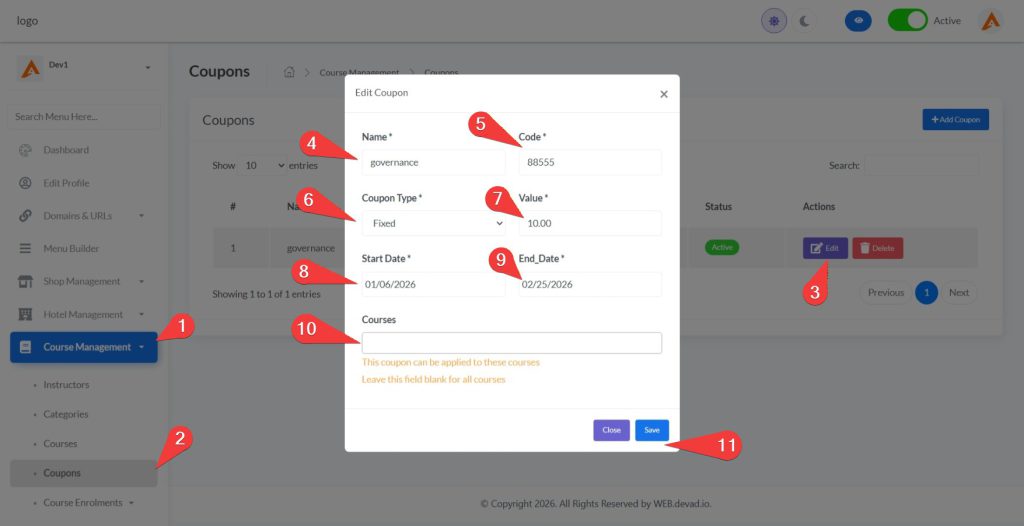
Path 1: Adding a New Coupon
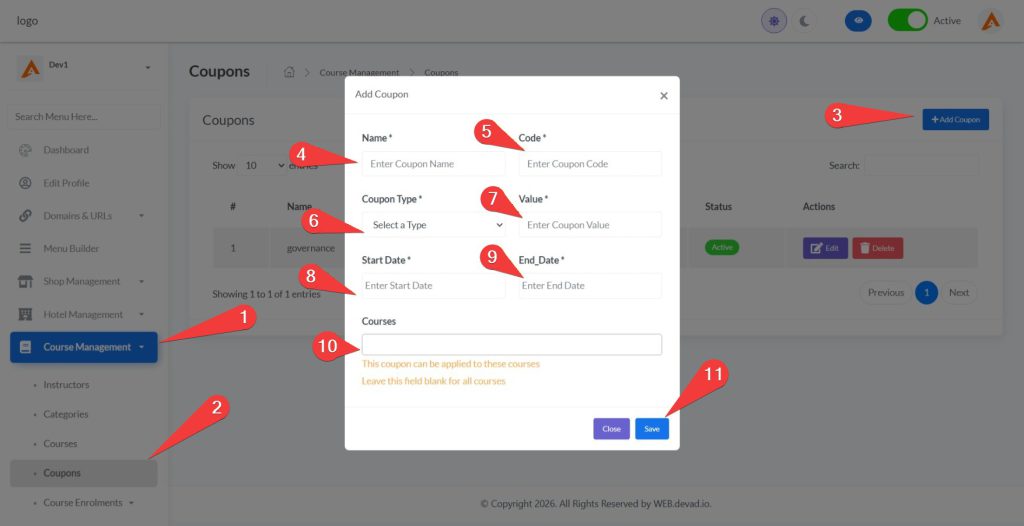
- Navigate to Course Management > Coupons
- Click “+Add Coupon” to open the creation modal
- Complete required fields:
- Enter a descriptive name (e.g., “Holiday Sale”)
- Create a unique code (e.g., “SAVE50”)
- Select coupon type (Fixed or Percentage)
- Enter the discount value
- Set start and end dates
- Optionally select specific courses (leave blank for all courses)
- Click “Save” to create the coupon
Path 2: Managing Existing Coupons
- View all active coupons in the Coupons table
- To edit a coupon:
- Click the edit icon (pencil) in the Actions column
- Update any details as needed
- Click “Save” to apply changes
- To delete a coupon:
- Click the delete icon (trash) in the Actions column
- Confirm deletion when prompted
Step 6: Monitoring Course Enrolments
Path 1: Viewing All Enrolments
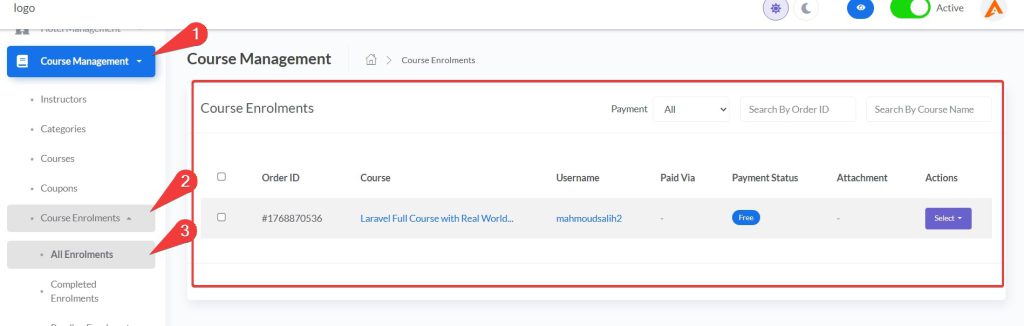
- Navigate to Course Management > Course Enrolments
- Review the complete list of student enrollments
- Use pagination controls to navigate through multiple pages
Path 2: Filtering and Searching Enrolments
- Filter enrolments by payment status:
- Use the dropdown to select “All”, “Completed”, “Pending”, or “Rejected”
- Search specific enrolments:
- Enter an order ID in the “Search By Order ID” field
- Enter a course name in the “Search By Course Name” field
- The system automatically refreshes with filtered results
Path 3: Generating Reports
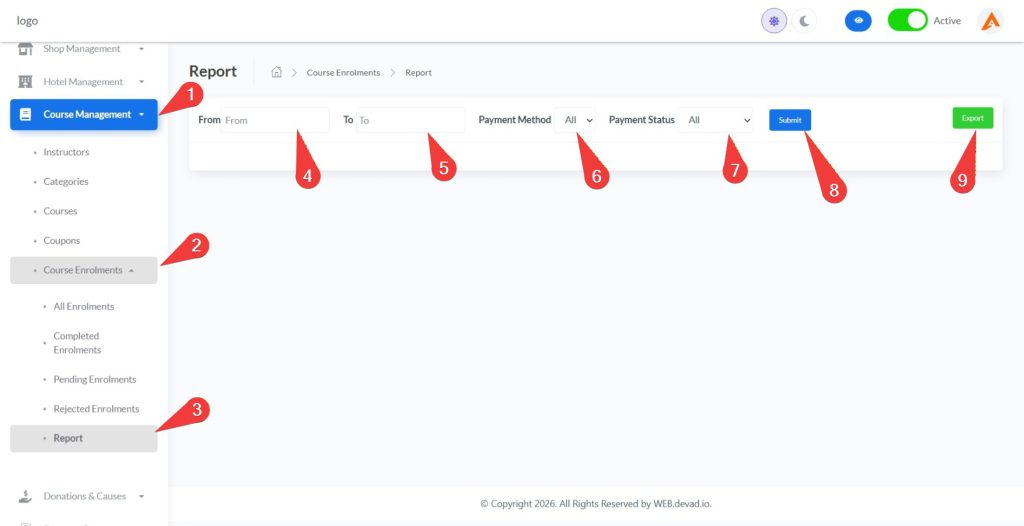
- From Course Enrolments, click “Report” in the secondary navigation
- Configure report filters:
- Set date range (From and To)
- Select payment method
- Choose payment status (All, Completed, Pending)
- Click “Submit” to generate the report
- Click “Export” to download a CSV file of the filtered data
Step 7: Configuring Payment Gateways (Complete Guide)
The platform supports 19 global payment gateways for accepting course payments worldwide. This guide provides detailed configuration instructions for each available gateway.
Path 1: Accessing Payment Gateway Settings
- Log in to https://web.devad.io/ as admin
- Click “Payment Gateways” in the left sidebar menu
- You’ll see a grid of all available payment gateway options
- Click on any gateway card to configure its settings
Path 2: Configuring Each Payment Gateway
1. Paypal
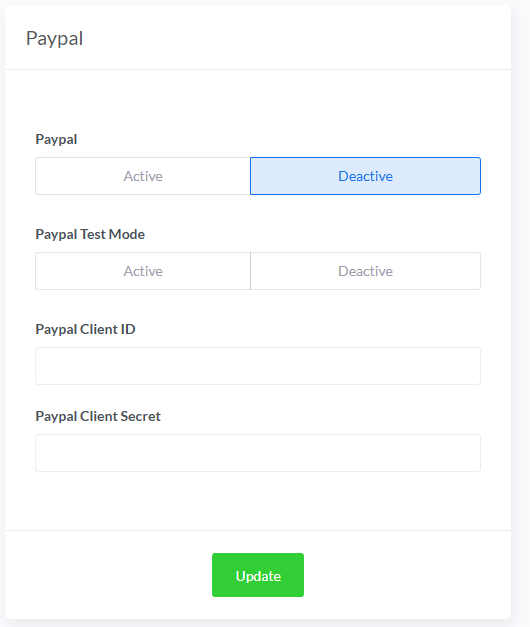
Configuration Steps:
- Toggle status to “Active” to enable PayPal payments
- Enable “Paypal Test Mode” for sandbox testing
- Enter your PayPal Client ID
- Enter your PayPal Client Secret
- Click “Update” to save settings
Where to get credentials:
- Create a developer account at developer.paypal.com
- Create a new app in the PayPal Developer Dashboard
- Use sandbox credentials for testing, live credentials for production
2. Stripe
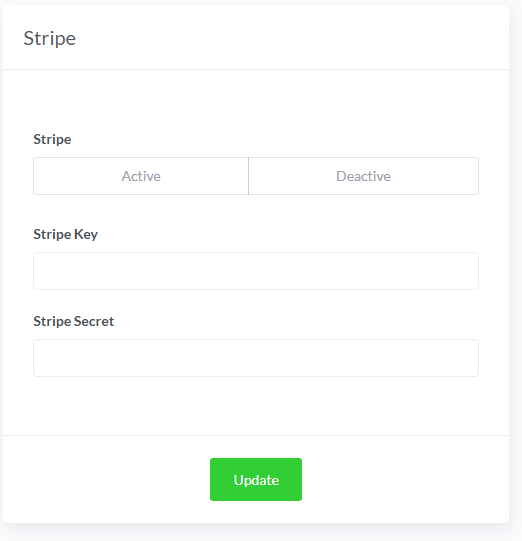
Configuration Steps:
- Toggle status to “Active” to enable Stripe payments
- Enter your Stripe Key (publishable key)
- Enter your Stripe Secret key
- Click “Update” to save settings
Where to get credentials:
- Sign up at dashboard.stripe.com
- Find your API keys in Developers > API keys section
- Use test keys during setup, switch to live keys when ready
3. Authorize.Net
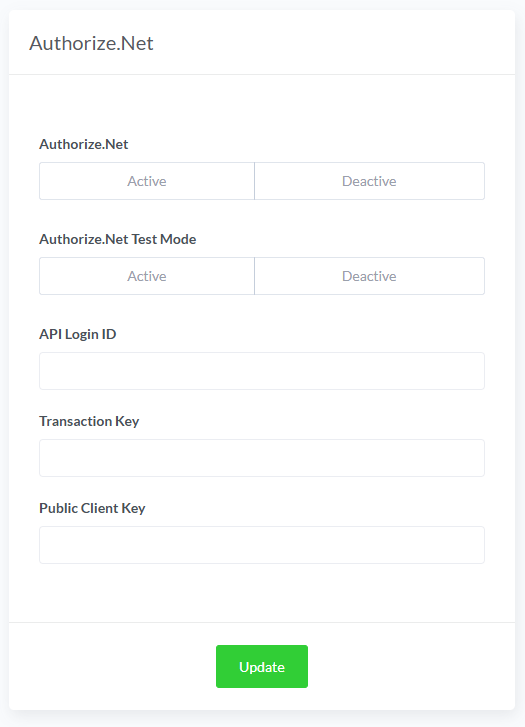
Configuration Steps:
- Toggle status to “Active” to enable Authorize.Net payments
- Enable “Authorize.Net Test Mode” for sandbox testing
- Enter your API Login ID
- Enter your Transaction Key
- Enter your Public Client Key
- Click “Update” to save settings
Where to get credentials:
- Create a merchant account at authorize.net
- Access API credentials in Account > API Credentials & Keys
- Request a sandbox account for testing before going live
4. Razorpay
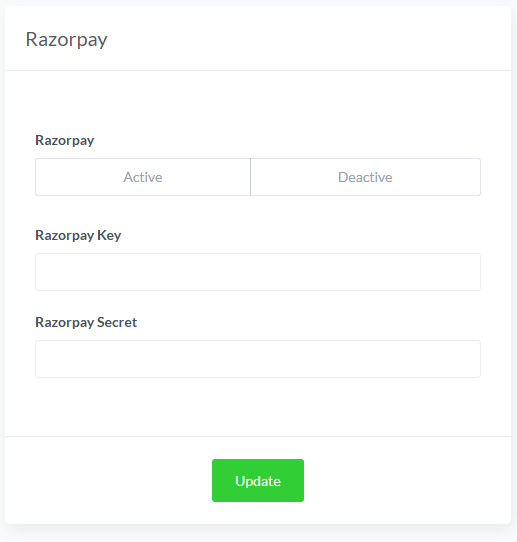
Configuration Steps:
- Toggle status to “Active” to enable Razorpay payments
- Enter your Razorpay Key
- Enter your Razorpay Secret
- Click “Update” to save settings
Where to get credentials:
- Register at dashboard.razorpay.com
- Find API keys in Settings > API Keys
- Use test mode for initial setup and testing
5. Flutterwave
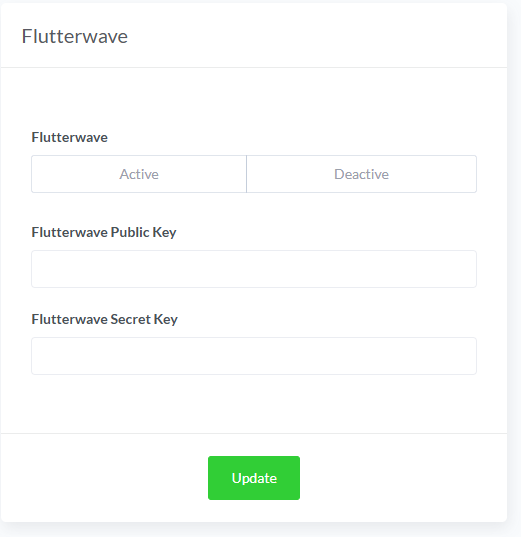
Configuration Steps:
- Toggle status to “Active” to enable Flutterwave payments
- Enter your Flutterwave Public Key
- Enter your Flutterwave Secret Key
- Click “Update” to save settings
Where to get credentials:
- Create account at flutterwave.com
- Access API keys in Settings > API Keys
- Switch between test and live modes as needed
6. Paystack
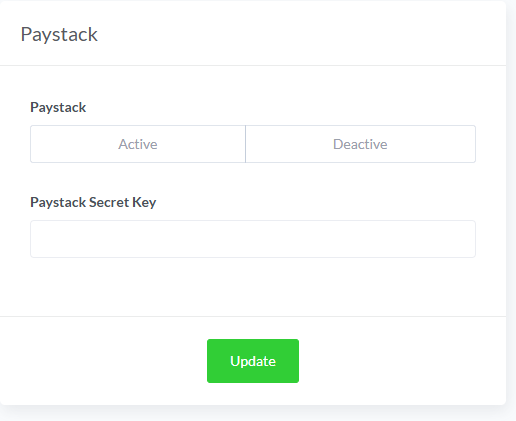
Configuration Steps:
- Toggle status to “Active” to enable Paystack payments
- Enter your Paystack Secret Key
- Click “Update” to save settings
Where to get credentials:
- Register at paystack.com
- Find your secret key in Settings > API Keys & Webhooks
- Start with test mode before enabling live payments
7. Mercadopago
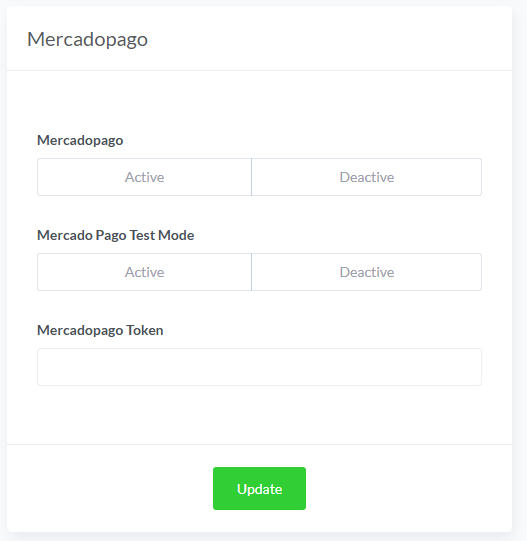
Configuration Steps:
- Toggle status to “Active” to enable MercadoPago payments
- Enable “Mercado Pago Test Mode” for sandbox testing
- Enter your Mercadopago Token
- Click “Update” to save settings
Where to get credentials:
- Sign up at developers.mercadopago.com
- Create credentials in Your apps section
- Use the test user credentials for initial testing
8. Paytabs
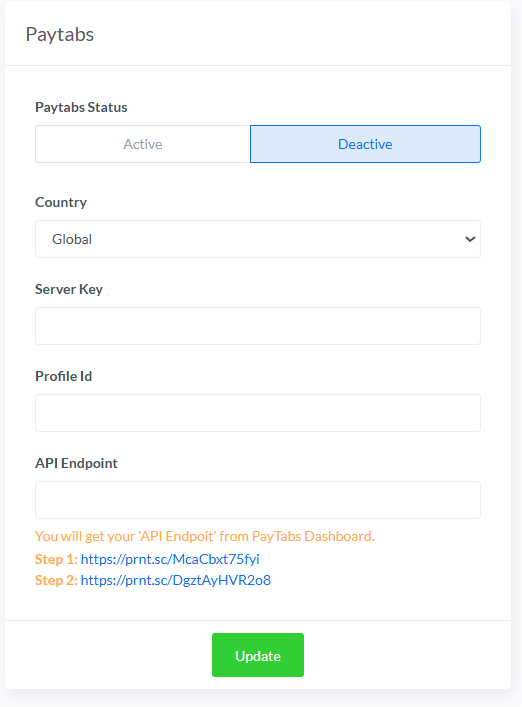
Configuration Steps:
- Toggle status to “Active” to enable Paytabs payments
- Select your country from the dropdown (Global, Saudi Arabia, UAE, Egypt, Oman, Jordan, Iraq)
- Enter your Server Key
- Enter your Profile ID
- Enter your API Endpoint URL
- Click “Update” to save settings
Where to get credentials:
- Create merchant account at paytabs.com
- Access API credentials in Merchant Dashboard > Developers
- Follow provided screenshots for proper endpoint configuration
9. Paytm
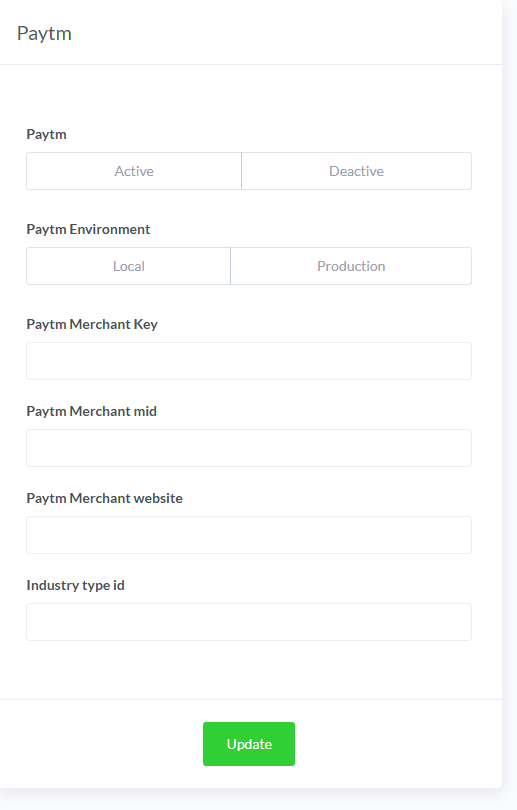
Configuration Steps:
- Toggle status to “Active” to enable Paytm payments
- Select environment (Local for testing, Production for live)
- Enter your Paytm Merchant Key
- Enter your Paytm Merchant MID
- Enter your Paytm Merchant Website name
- Enter your Industry Type ID
- Click “Update” to save settings
Where to get credentials:
- Register at paytm.com/business
- Access API credentials in the merchant dashboard
- Use staging credentials for testing before going live
10. Perfect Money
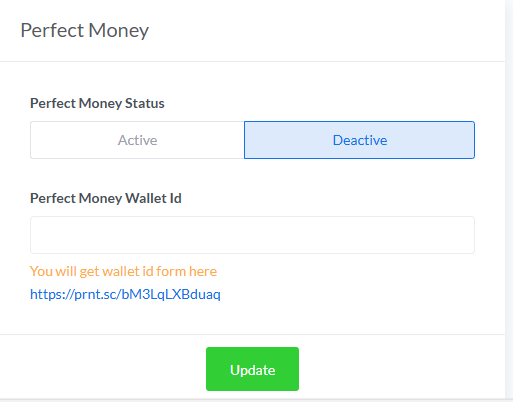
Configuration Steps:
- Toggle status to “Active” to enable Perfect Money payments
- Enter your Perfect Money Wallet ID
- Click “Update” to save settings
Where to get credentials:
- Register at perfectmoney.com
- Find your wallet ID in the account settings
- Follow provided screenshot link for visual guidance
11. Instamojo
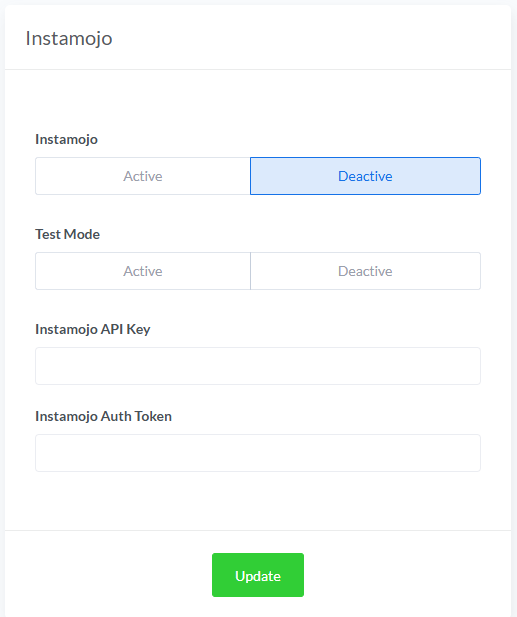
Configuration Steps:
- Toggle status to “Active” to enable Instamojo payments
- Enable “Test Mode” for sandbox testing
- Enter your Instamojo API Key
- Enter your Instamojo Auth Token
- Click “Update” to save settings
Where to get credentials:
- Create account at instamojo.com
- Access API credentials in Developers section
- Use test credentials for initial setup
12. Mollie Payment
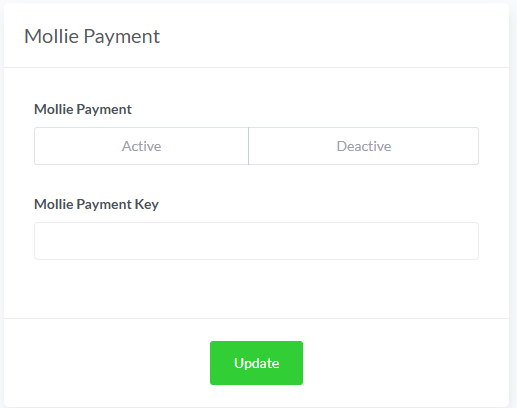
Configuration Steps:
- Toggle status to “Active” to enable Mollie payments
- Enter your Mollie Payment Key
- Click “Update” to save settings
Where to get credentials:
- Register at mollie.com
- Find API keys in Developers section
- Configure payment methods in your Mollie dashboard
13. Xendit
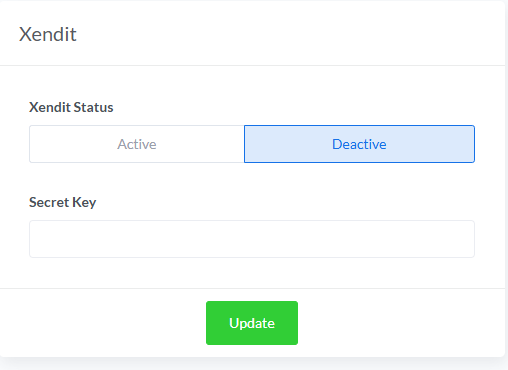
Configuration Steps:
- Toggle status to “Active” to enable Xendit payments
- Enter your Xendit Secret Key
- Click “Update” to save settings
Where to get credentials:
- Sign up at xendit.co
- Access API keys in Settings > API Keys
- Enable specific payment methods in your Xendit dashboard
14. Phonepe
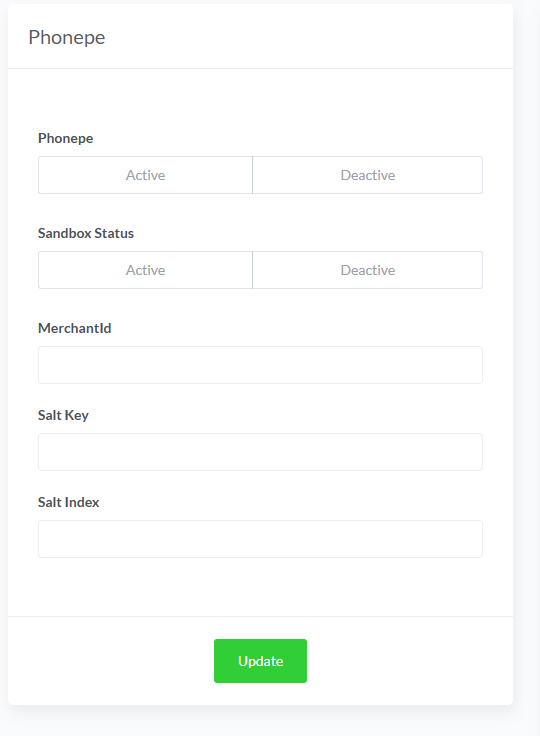
Configuration Steps:
- Toggle status to “Active” to enable Phonepe payments
- Enable “Sandbox Status” for testing
- Enter your Merchant ID
- Enter your Salt Key
- Enter your Salt Index
- Click “Update” to save settings
Where to get credentials:
- Register as a merchant at phonepe.com/business
- Access API credentials in the merchant portal
- Use test credentials before enabling live payments
15. Yoco
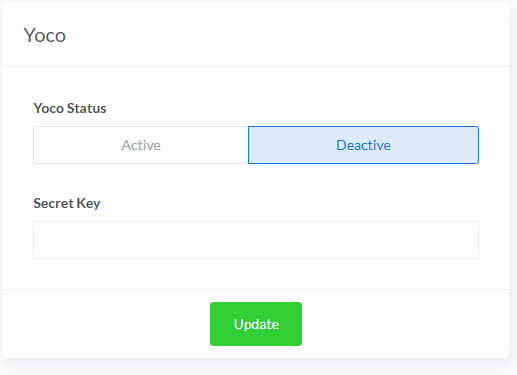
Configuration Steps:
- Toggle status to “Active” to enable Yoco payments
- Enter your Secret Key
- Click “Update” to save settings
Where to get credentials:
- Register at yoco.com
- Find API credentials in Business Settings > Developers
- Use sandbox credentials for testing
16. Iyzico
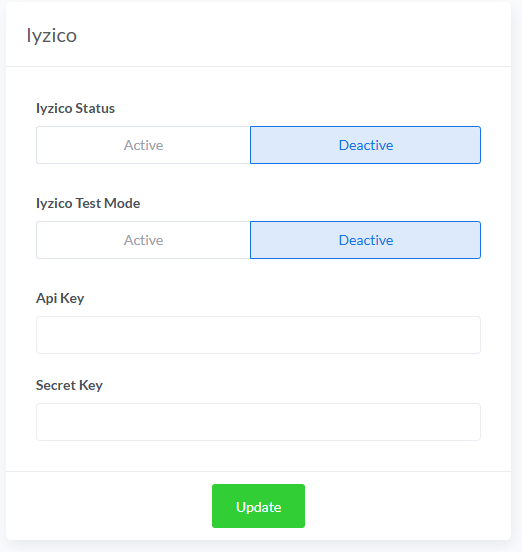
Configuration Steps:
- Toggle status to “Active” to enable Iyzico payments
- Enable “Iyzico Test Mode” for sandbox testing
- Enter your Api Key
- Enter your Secret Key
- Click “Update” to save settings
Where to get credentials:
- Register at iyzico.com
- Access API credentials in Settings > API Integration
- Configure payment methods in your Iyzico dashboard
17. Midtrans
Configuration Steps:
- Toggle status to “Active” to enable Midtrans payments
- Enable “Midtrans Test Mode” for sandbox testing
- Enter your Server Key
- Configure notification URLs as shown in the instructions
- Click “Update” to save settings
Where to get credentials:
- Register at midtrans.com
- Access API keys in Settings > API Keys
- Configure notification URLs in the Midtrans dashboard
18. MyFatoorah
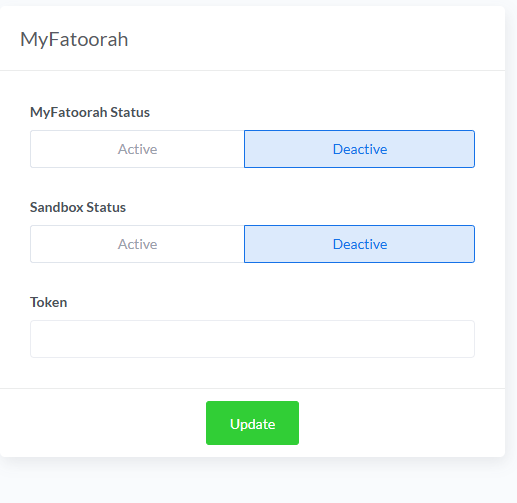
Configuration Steps:
- Toggle status to “Active” to enable MyFatoorah payments
- Enable “Sandbox Status” for testing
- Enter your Token
- Click “Update” to save settings
Where to get credentials:
- Register at myfatoorah.com
- Access API credentials in Developer Portal
- Use sandbox credentials for initial testing
19. Toyyibpay
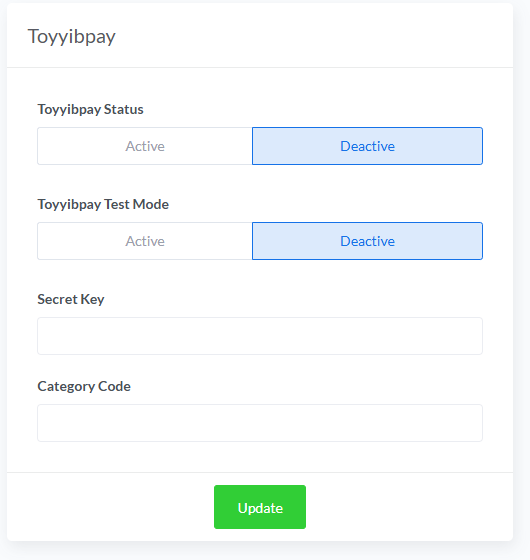
Configuration Steps:
- Toggle status to “Active” to enable Toyyibpay payments
- Enable “Toyyibpay Test Mode” for sandbox testing
- Enter your Secret Key
- Enter your Category Code
- Click “Update” to save settings
Where to get credentials:
- Register at toyyibpay.com
- Access API credentials in the merchant dashboard
- Configure payment categories before integration
Step 8: Configuring Offline Payment Gateways
Offline payment gateways allow you to accept payments through methods that don’t process transactions instantly online, such as bank transfers, cash on delivery, or check payments. These options are essential for students who prefer traditional payment methods or don’t have access to online payment systems.
Path 1: Adding a New Offline Gateway
- Log in to https://web.devad.io/ as admin
- Click “Payment Gateways” in the left sidebar menu
- Select “Offline Gateways” from the expanded submenu
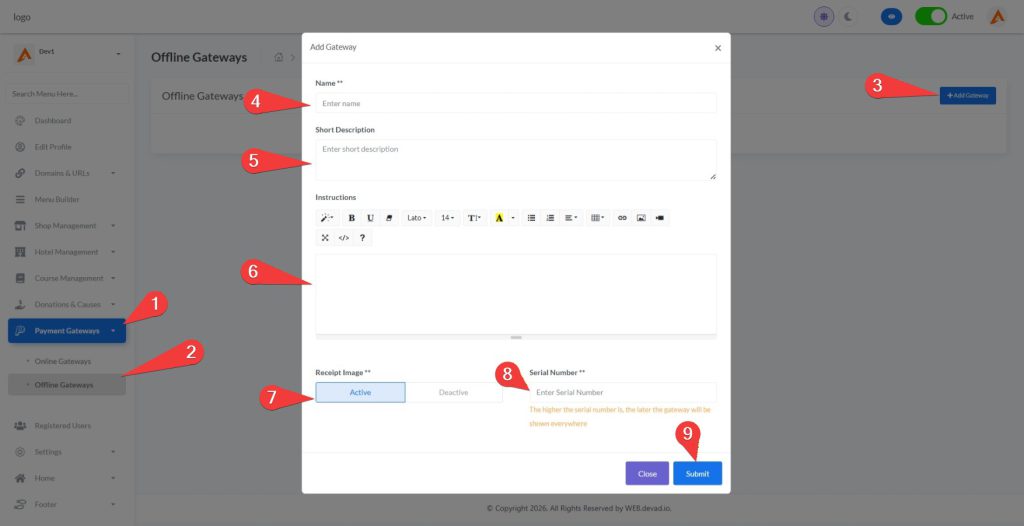
- Click the “+Add Gateway” button in the top-right section
- In the gateway creation modal, complete the following fields:
- Name: Enter a descriptive name for your payment method (e.g., “Bank Transfer,” “Cash on Delivery,” “Check Payment”)
- Short Description: Add a brief description that students will see during checkout (e.g., “Pay via bank transfer to our account”)
- Instructions: Provide detailed instructions for students on how to complete payment (this will appear after enrollment)
- Receipt Image: Toggle this option to “Active” if you want to require students to upload proof of payment
- Serial Number: Enter a display order number (higher numbers appear later in the payment options list)
- Click “Submit” to save your offline gateway configuration
Path 2: Editing Existing Offline Gateways
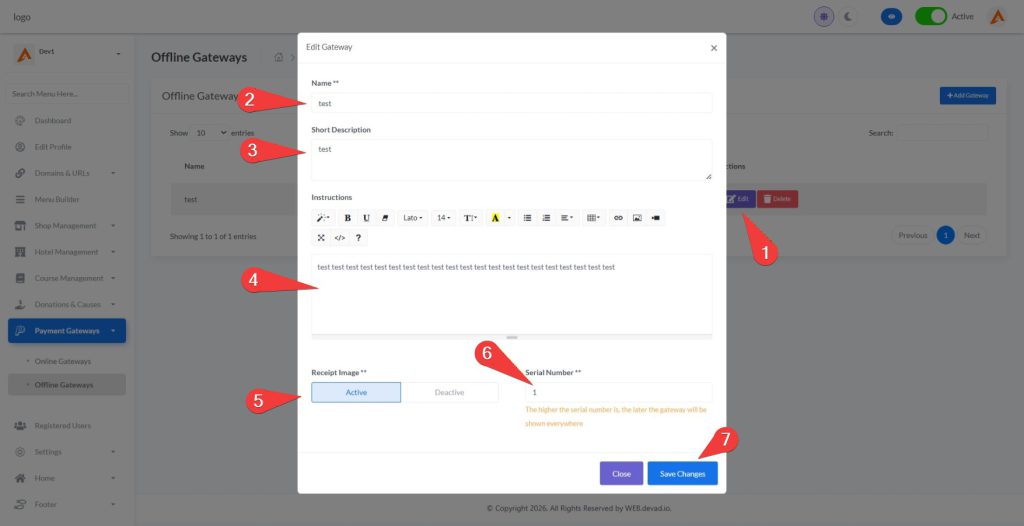
- From the Offline Gateways page, locate the gateway you wish to modify
- Click the edit button (pencil icon) next to the target gateway
- In the edit modal, update any of the following details as needed:
- Gateway name
- Short description text
- Payment instructions
- Receipt image requirement status
- Display order (serial number)
- Click “Save Changes” to update the gateway configuration
Path 3: Student Experience with Offline Payments
When students select an offline payment method during checkout:
- They complete their enrollment information
- After clicking “Enroll Now,” they’ll see the payment instructions you configured
- If receipt images are required, they’ll need to upload proof of payment
- Their enrollment status will show as “Pending” until payment is verified by an admin
- Admins can then update the payment status to “Completed” after confirming payment was received
Student Role
Step 1: New Student Registration
- Navigate to your course website at https://web.devad.io/Dev1
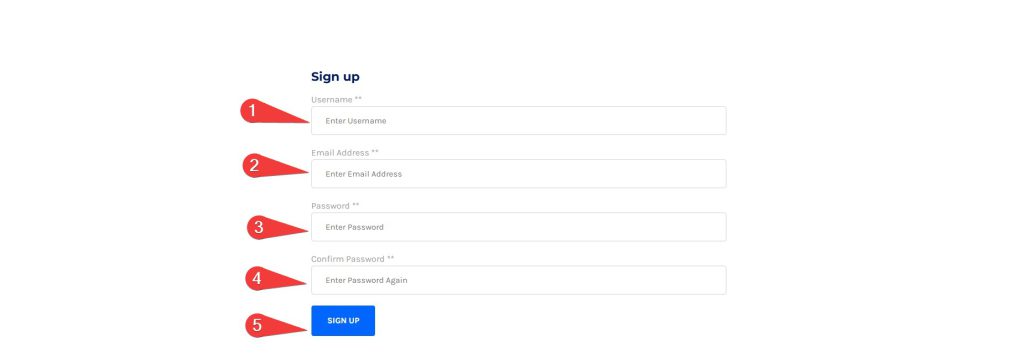
- Click the “Sign Up” button in the top navigation menu
- Complete the registration form with the following details:
- Username: Enter a unique username for your account
- Email Address: Provide a valid email address (this will be your login ID)
- Password: Create a strong password with at least 8 characters
- Confirm Password: Re-enter the same password to confirm
- Click the “Sign Up” button to create your account
- Check your email inbox for a verification link (if email verification is enabled)
- Click the verification link to activate your account
- After verification, you’ll be redirected to the login page to access your new account
Step 2: Student Login Process

- Navigate to https://web.devad.io/James
- Click the “Login” button in the top navigation menu
- Enter your credentials:
- Email Address: The email you used during registration
- Password: Your account password
- Click the “Login Now” button to access your dashboard
- If you’ve forgotten your password:
- Click the “Lost your password?” link
- Enter your email address
- Follow the instructions sent to your email to reset your password
Step 3: Updating Student Profile Information
After logging in to your dashboard, you can update your personal information to keep your account current and ensure you receive important course notifications.
Path 1: Accessing the Profile Editor
- Log in to https://web.devad.io/Dev1 with your credentials
- Click on your dashboard link in the top navigation menu
- In the left sidebar menu, click on “My Profile” to access your profile editing page
- The page will display your current profile information and editing options
Path 2: Updating Profile Details
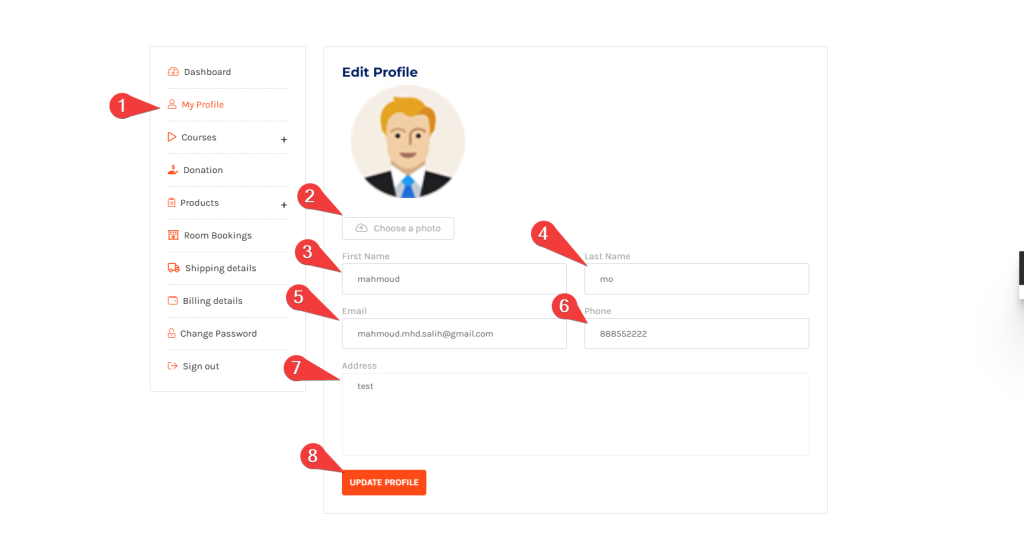
- To update your profile picture:
- Click the “Choose a photo” button
- Select a JPG, JPEG, or PNG file from your device
- The system will show a preview of your selected image
- Update your personal details:
- Enter your first name in the “First Name” field
- Enter your last name in the “Last Name” field
- Your email address is displayed but cannot be modified directly
- Enter your phone number in the “Phone” field
- Add your complete address in the “Address” text area
- Click the “Update Profile” button to save all changes
Step 4: Managing Billing Details
Billing details are essential for processing course payments and generating invoices. Keeping this information accurate ensures smooth transactions and proper delivery of purchase receipts.
Path 1: Accessing Billing Details Page
- Log in to your student account at https://web.devad.io/Dev1
- Navigate to your dashboard by clicking the “Dashboard” link in the top navigation
- In the left sidebar menu, locate and click on “Billing details” under the Account Settings section
- The billing details form will appear on the right panel of your dashboard
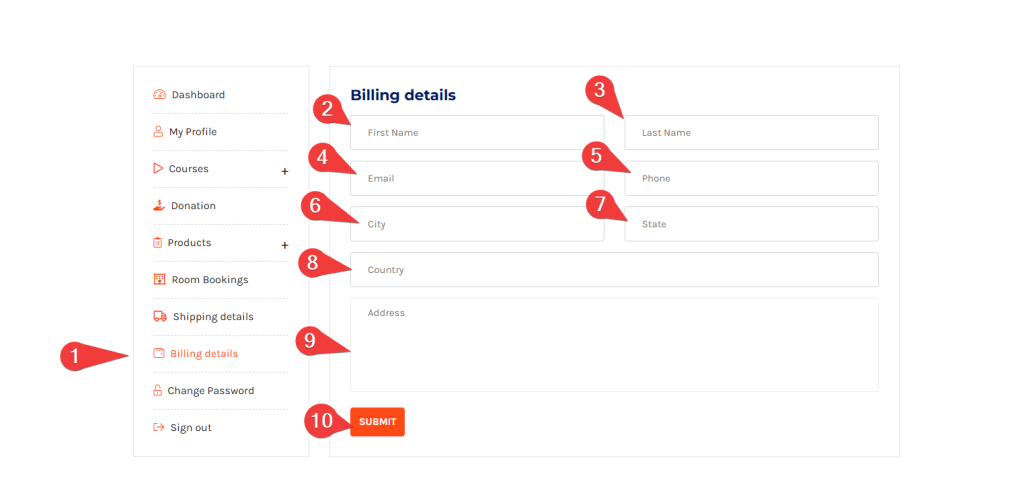
Path 2: Updating Billing Information
- Complete all required fields in the billing form:
- First Name: Enter your legal first name as it appears on your payment method
- Last Name: Enter your legal last name
- Email: Provide the email address where you want to receive invoices and receipts
- Phone: Enter contact number for payment verification purposes
- City: Specify your city of residence
- State: Enter your state or province
- Country: Select your country from the dropdown or type it manually
- Address: Provide your complete street address including apartment/suite numbers
- Review all information for accuracy
- Click the “Submit” button to save your billing details
- Confirm successful update via the notification message that appears
Path 3: Validation Requirements
The system enforces strict validation to ensure payment processing success:
- All fields marked with an asterisk (*) are mandatory
- Email must follow valid format ([email protected])
- Phone number should include country code for international transactions
- Address must contain sufficient details for invoice generation
- Special characters in names and addresses should be properly formatted
If validation fails, error messages will appear below the respective fields highlighting what needs correction before resubmission.
Path 4: Security Considerations
- Your billing information is encrypted and stored securely
- Never share your billing details via email or chat
- Update your billing information whenever:
- You change payment methods
- You move to a new address
- Your contact information changes
- Always log out after updating sensitive billing information, especially when using public computers
Step 5: Enrolling in Courses
The course catalog is designed to help students easily find and enroll in courses that match their learning goals and interests. The platform provides multiple filtering and search options to simplify course discovery.
Path 1: Accessing the Course Catalog
- Navigate to the courses page at https://web.devad.io/Dev1/courses
- The page displays all available courses organized in a grid layout
- Each course card shows essential information:
- Course thumbnail image
- Category tag (e.g., “php”, “governance”)
- Course title
- Instructor name
- Price (Free or monetary value)
- Number of enrolled students
- Estimated course duration
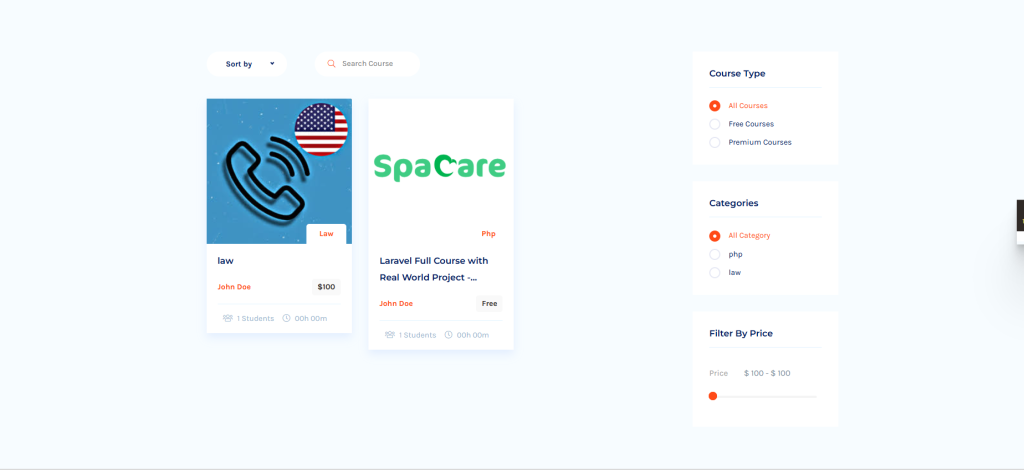
Path 2: Finding the Right Course
The platform offers multiple ways to find suitable courses:
- Filter by Course Type:
- Click “All Courses” to see every available course
- Select “Free Courses” to view only complimentary courses
- Choose “Premium Courses” to see paid course offerings
- Filter by Category:
- Select specific categories like “php” or “governance” to narrow your search
- Click “All Category” to reset category filters
- Filter by Price Range:
- Use the price slider to set minimum and maximum price values
- This is particularly helpful for students with budget constraints
- Sort Courses:
- “New Course”: Shows recently added courses first
- “Old Course”: Shows earliest created courses first
- “Price ascending”: Shows courses from lowest to highest price
- “Price descending”: Shows courses from highest to lowest price
- Search by Keyword:
- Use the search bar to find courses by title or description keywords
- Simply type your search term and results will update automatically
Path 3: Enrolling in a Course
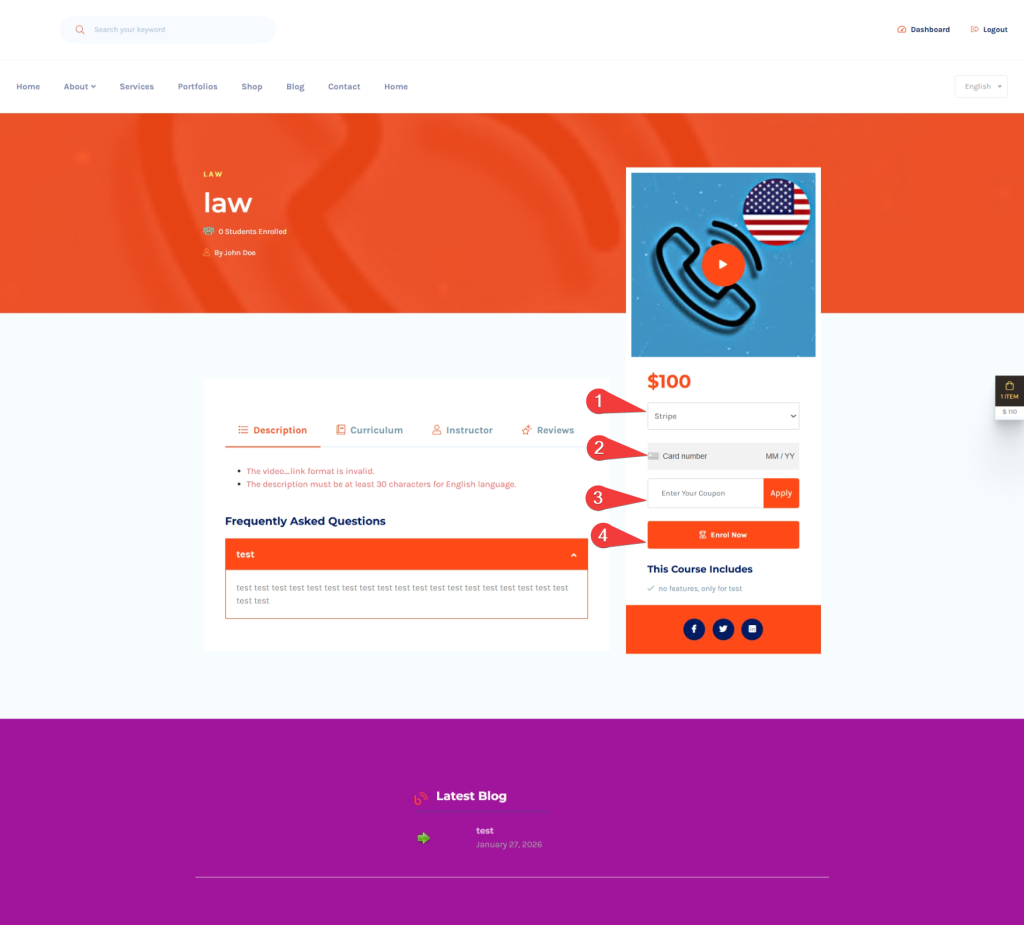
- From the course listing page, click on the course title or thumbnail image of your desired course
- This will take you to the detailed course page showing:
- Full course description
- Curriculum outline with modules and lessons
- Instructor profile and credentials
- Student reviews and ratings (if available)
- For free courses:
- Confirm enrollment in the popup dialog
- You’ll be immediately redirected to your course dashboard
- For paid courses:
- Select your preferred payment method (PayPal, Stripe, or offline options)
- Enter any applicable coupon codes in the designated field
- Complete the payment process through the selected gateway
- After successful payment, you’ll gain immediate access to course content
- On the course details page, click the “Enroll Now” button
Path 4: Accessing Enrolled Courses
After enrollment:

- Click on “Dashboard” in the top navigation menu
- Select “Courses” ==> “Courses” from the sidebar menu
- Your enrolled courses will appear in this section
- Click on any course “curriculum” button to access:
- Course curriculum and lesson materials
- Quizzes and assignments
- Certificate generation (upon completion)
- Use the course navigation menu to move between different modules and lessons
Note: For free courses, access is granted immediately after clicking “Enrol Now.” For paid courses, access begins after payment confirmation. If you experience any issues accessing course content after enrollment, contact support through the website’s contact form.
