SITE.devad.io is the simplest Online Store builder, yet the cheapest ever. With its rich features, no feature is limited.
Step 1: Choose Theme and Main Store Details
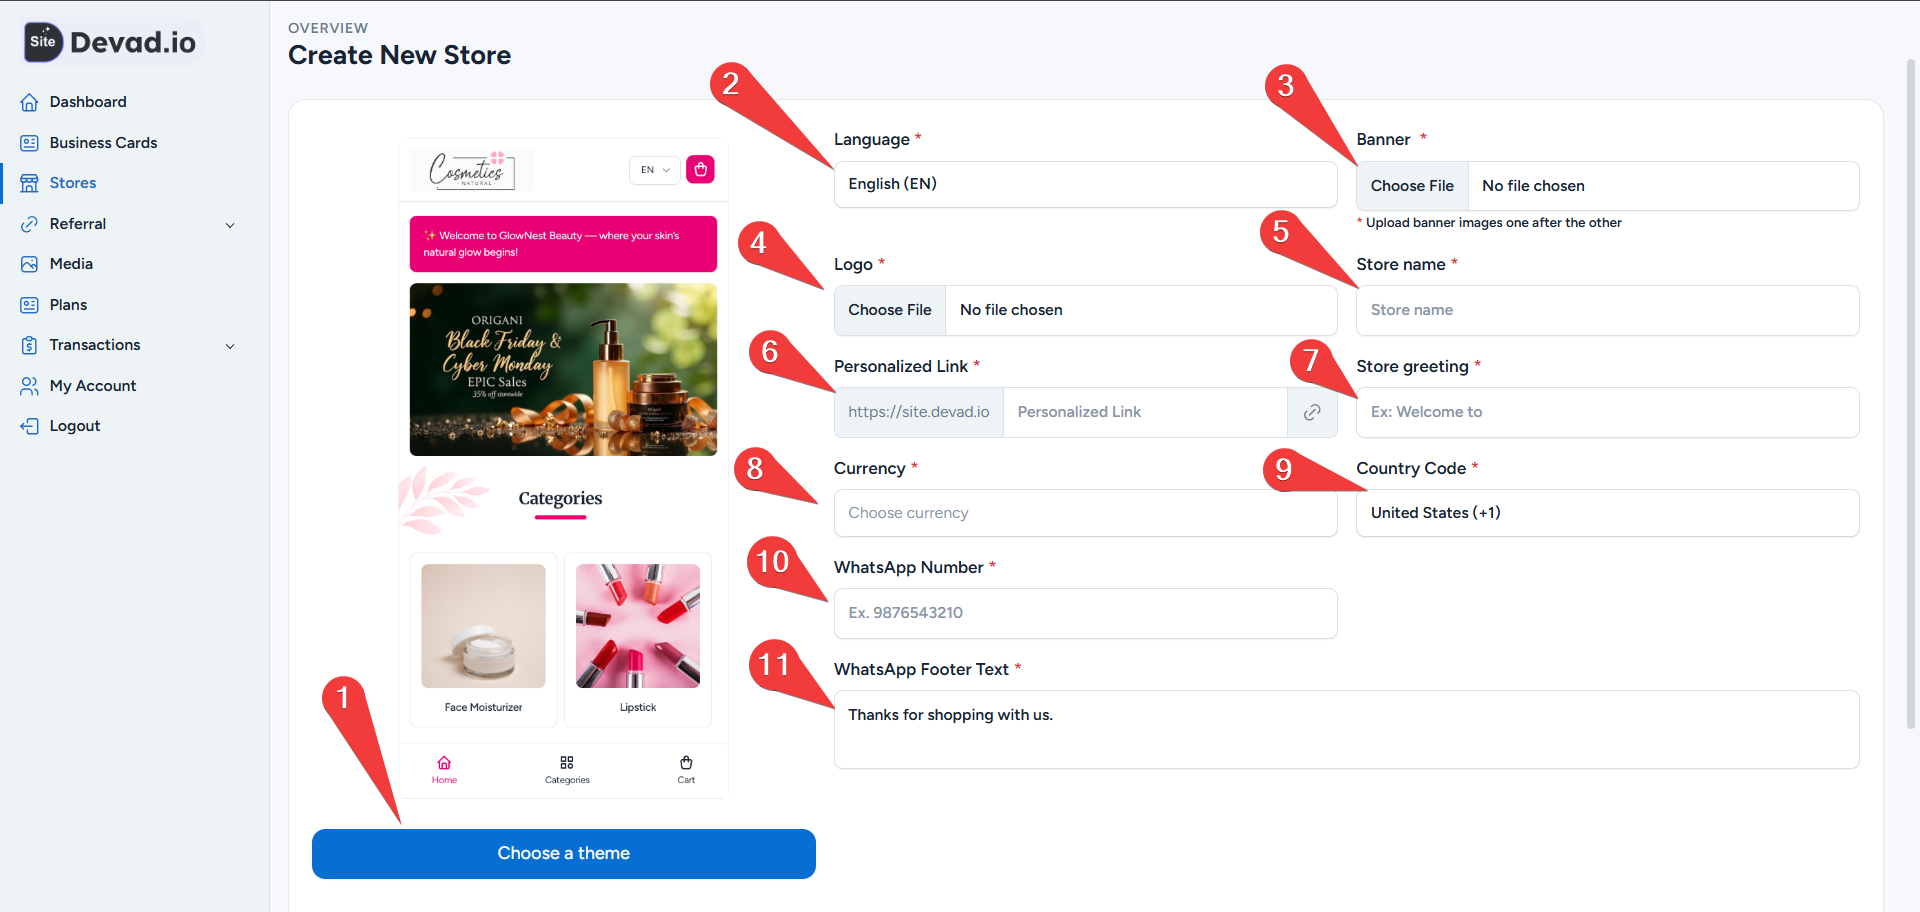
1- Choose your store theme from 20+ WhatsApp Store themes
2- Choose the primary language for the store
3- Upload the Banner for the store
4- Upload the store logo
5- Enter the Brand name of your store
6- Type the SEO/Personalized Link
7- Add the Store greeting (e.g., new offer or free shipping)
8- Add your store Currency
9- Set the Country Code for WhatsApp
10- Add your store WhatsApp Number to receive your orders
11- Add WhatsApp Footer Text
Step 2: Add the Category for Your Products
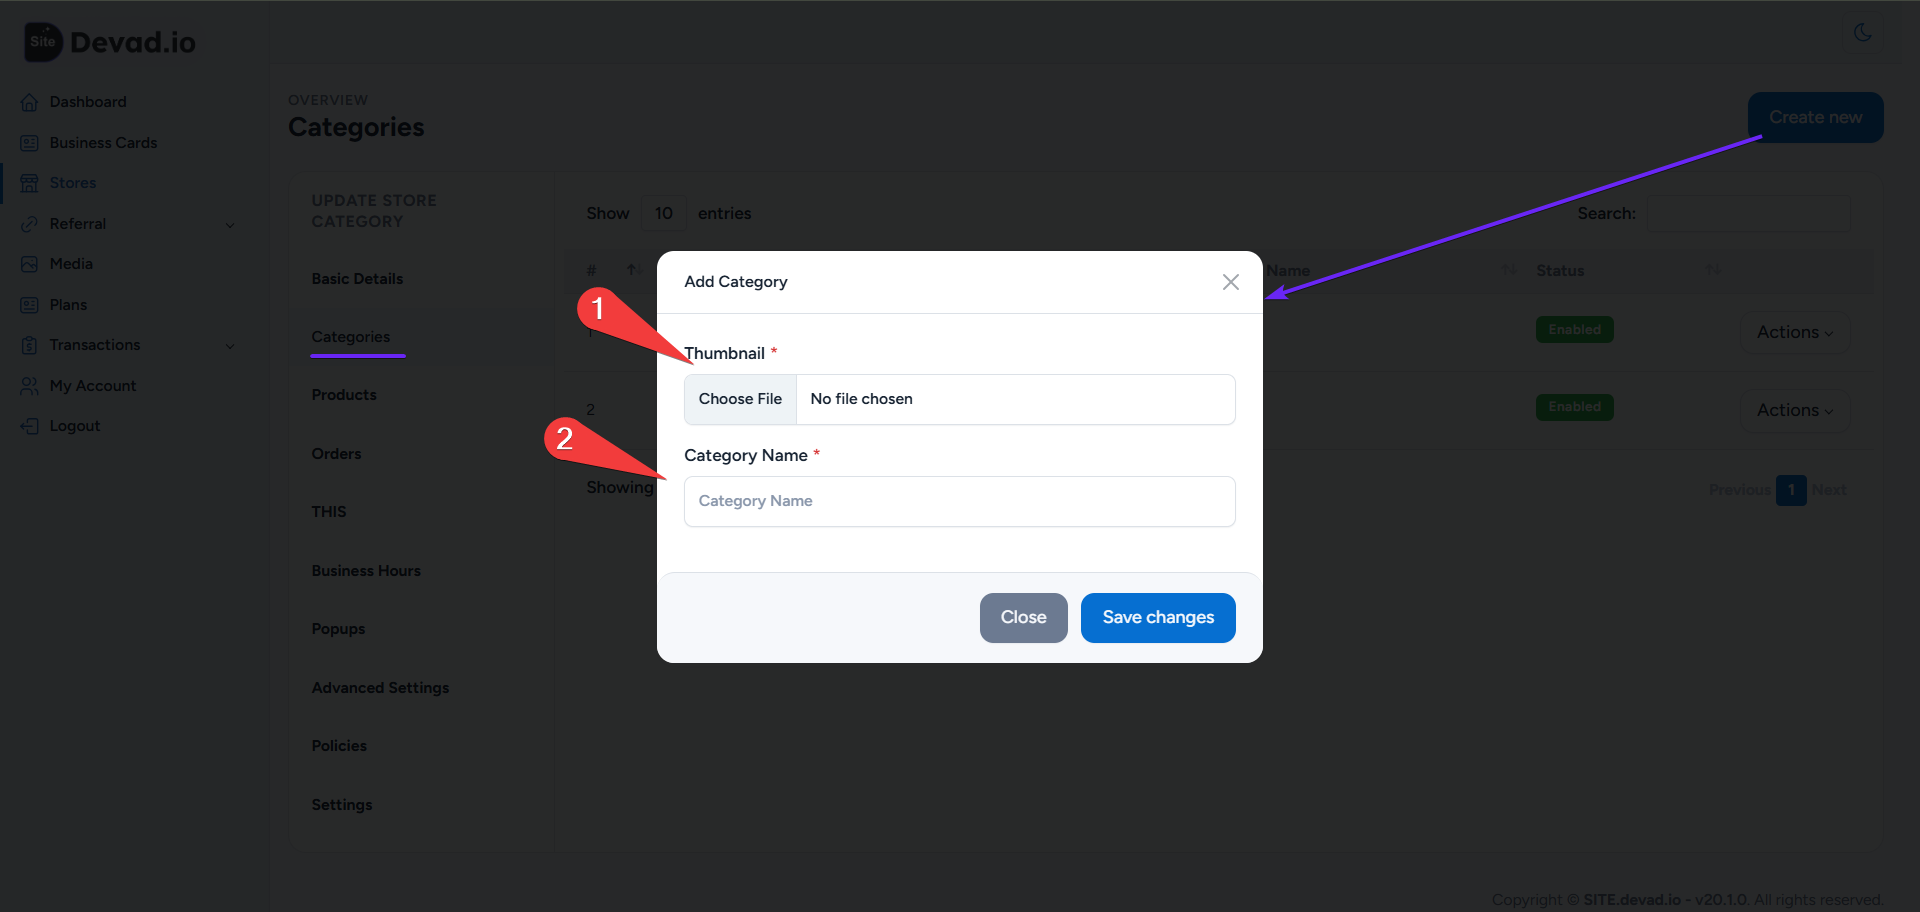
1- Add your category Thumbnail / small image
2- Type the category name
Step 3: Add Your Services
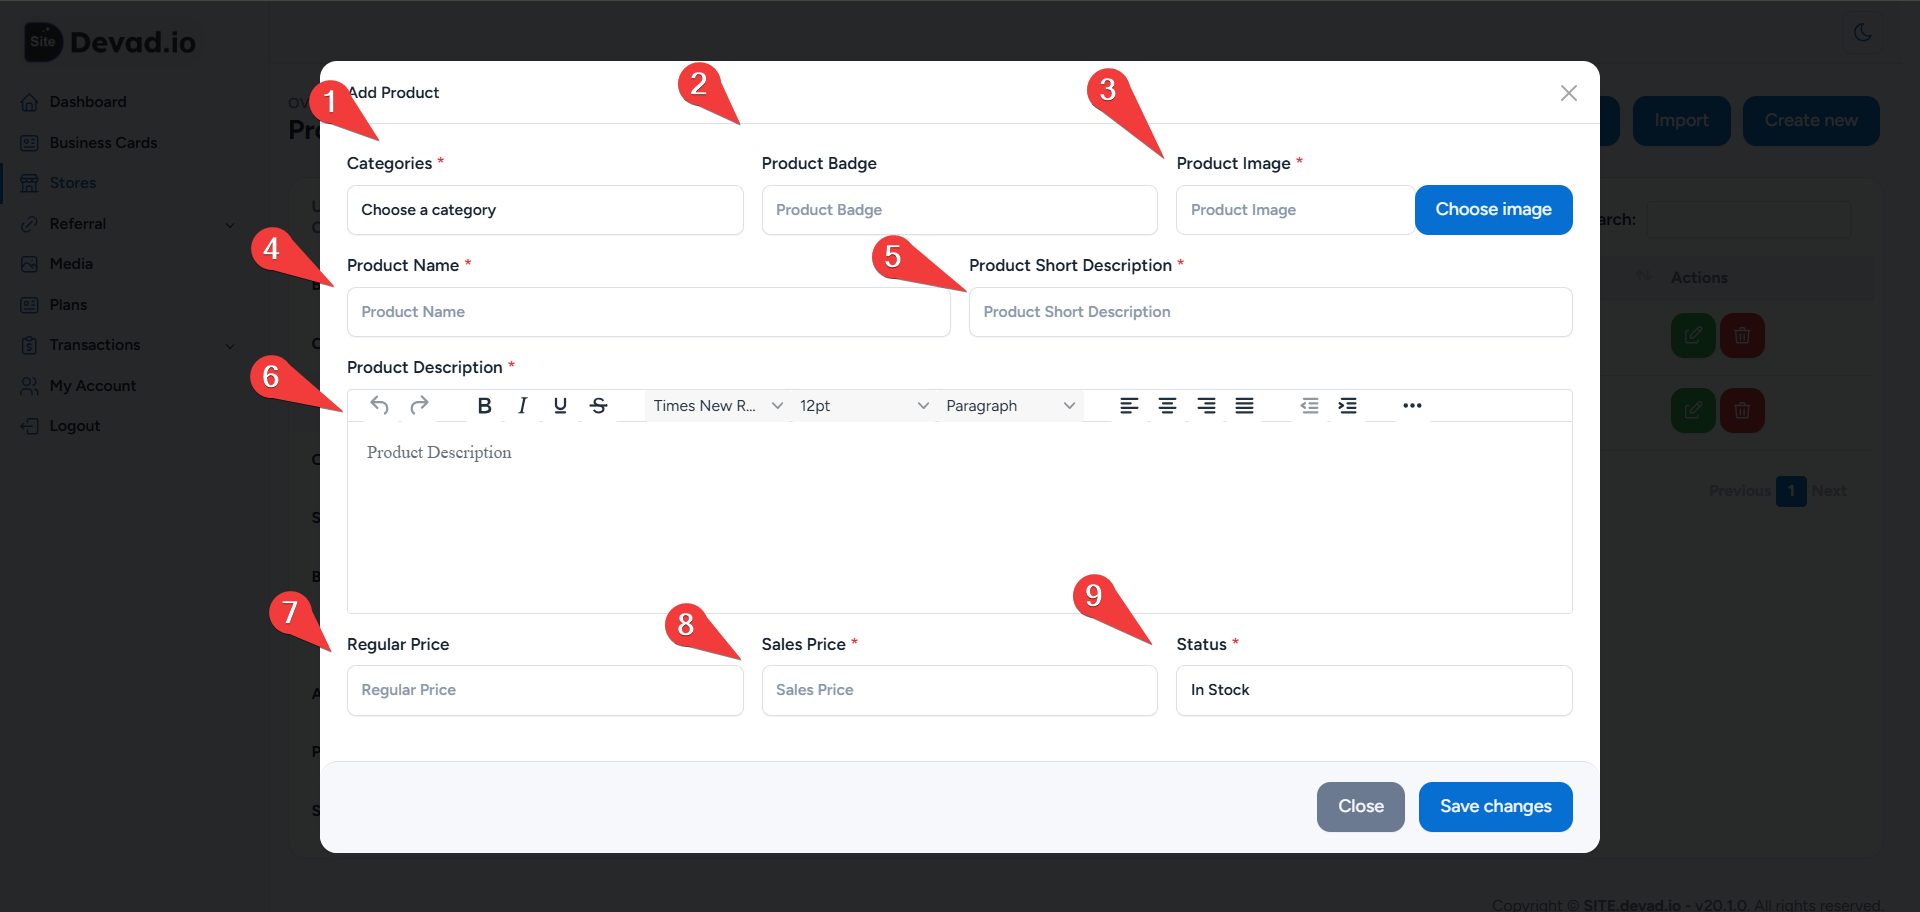
1- Choose the product category
2- Type product badge (e.g., Best Selling, Free Shipping)
3- Upload product images. We recommend using a Compression Tool like Squoosh.app to make your store faster
4- Type your product name
5- Add product short description
6- Add product full description. We recommend using bullets and short sentences
7- Add Regular Price
8- Add Sales Price
9- Set Status to ‘In Stock’ to allow purchase. Set ‘Out of Stock’ to disable ordering
Example of CSV table:
| product_image | product_name | product_short_description | product_description | regular_price | sales_price | product_status | status |
| storage/images/68cdc15eab81d-69132f7e9586d.png | Fish | free shipping | <p>fresh and high quality</p> | 35 | 20 | instock | 1 |
Step 4: Manage Orders
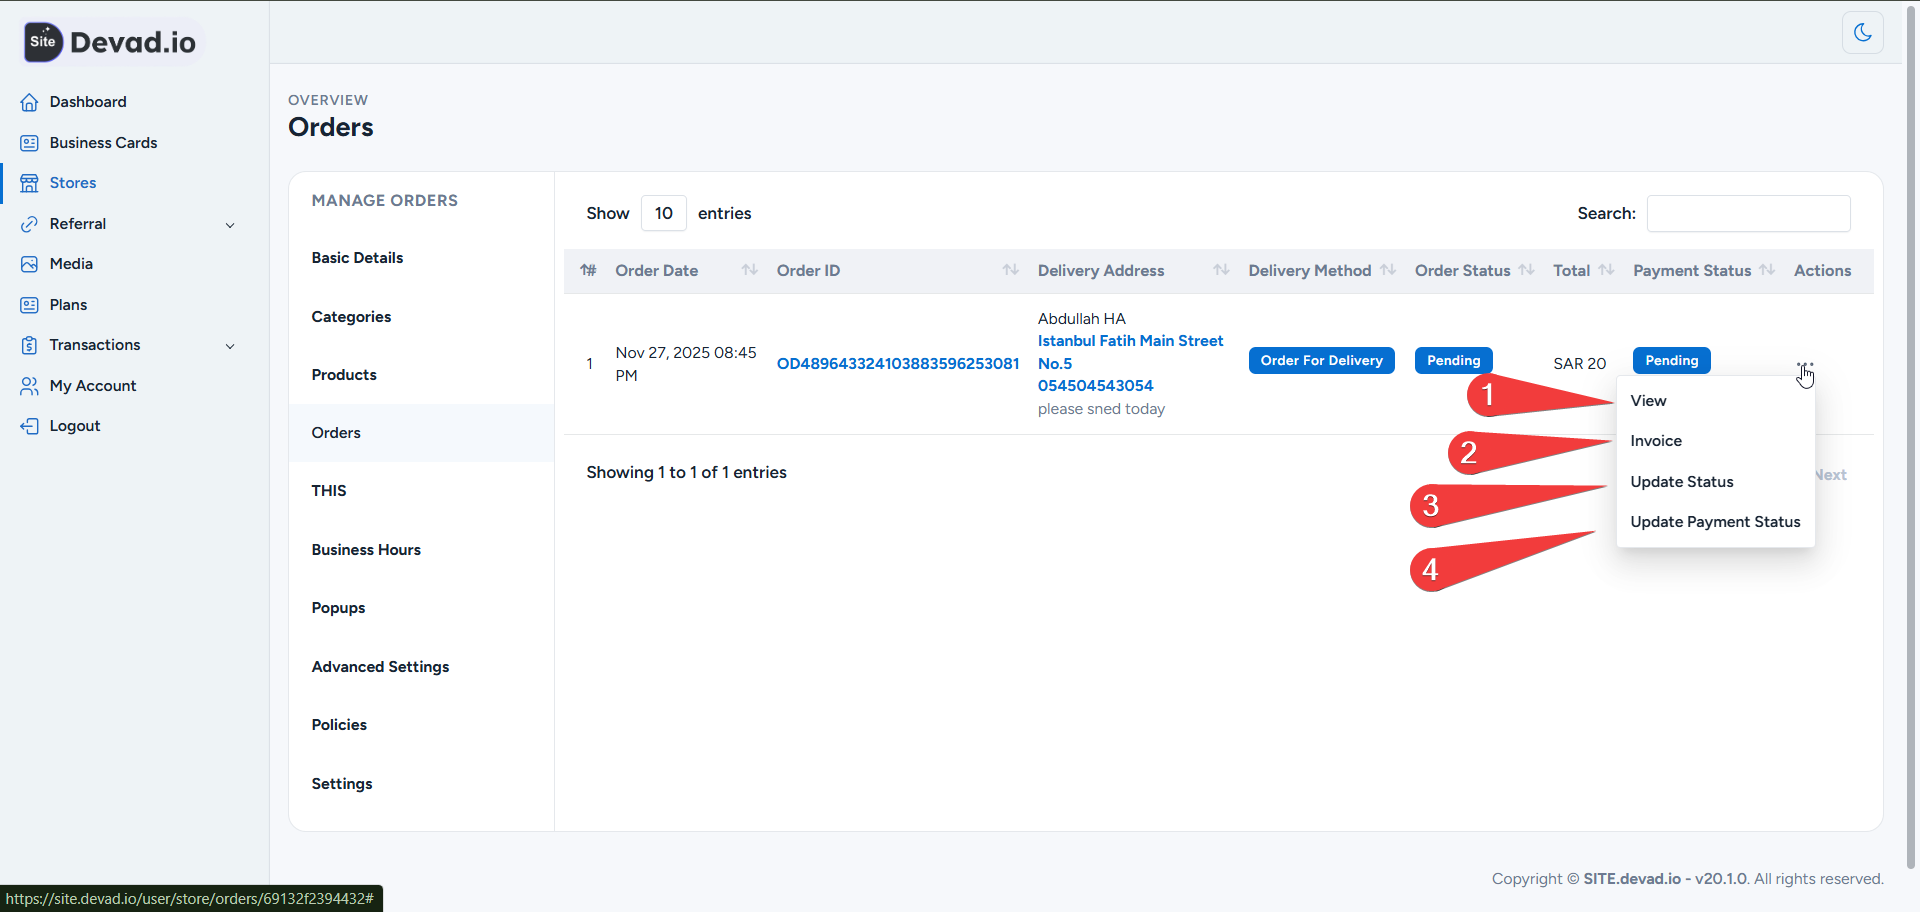
1- View order details and status
2- Check the invoice details with the option to print or download
3- Update Order Status
4- Update Payment Status
Step 4: Manage SEO Settings
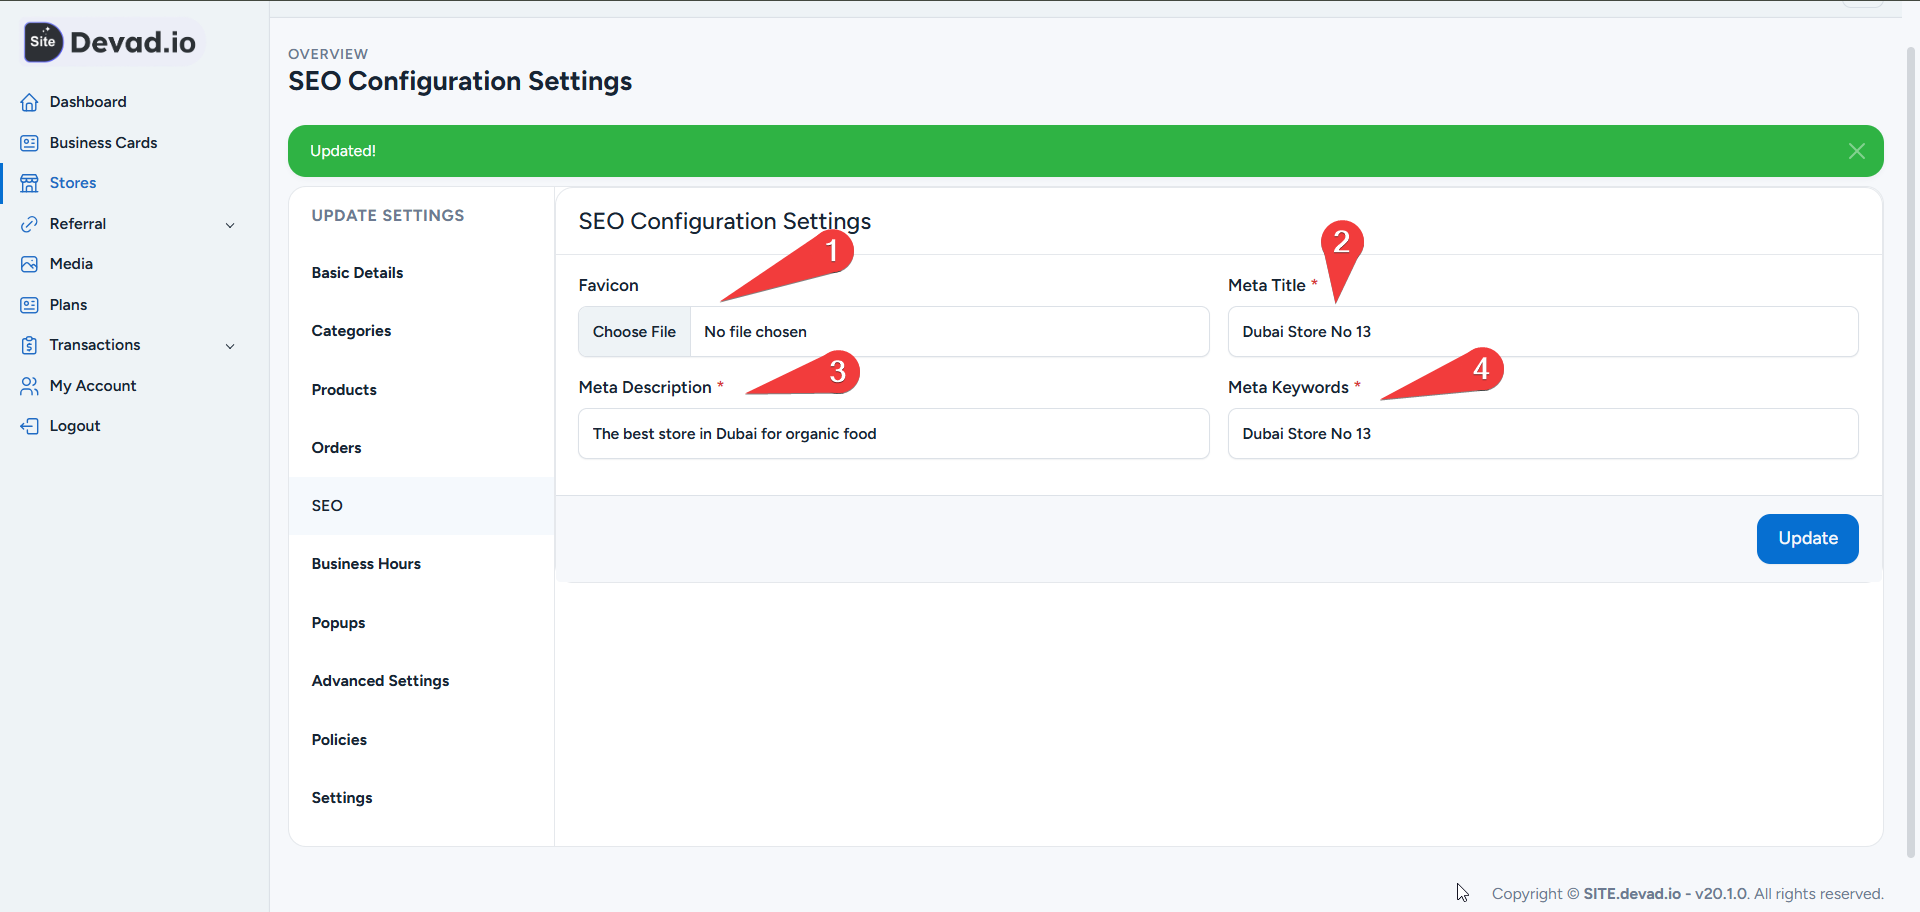
1- Add Favicon, which is your store logo (It appears in the browser tab, next to the site title in bookmarks, and beside the URL on Google Search results pages.)
2- Add Meta Title (appears as the main clickable blue headline on the Google search results page and in the browser tab title)
3- Add Meta Description (compelling and keyword-rich, about 150 – 160 characters)
4- Add Meta Keywords as a comma-separated list (e.g., Dubai store, Dubai shop, Dubai online store)
Step 5: Add Your Store Business Hours / Working Hours
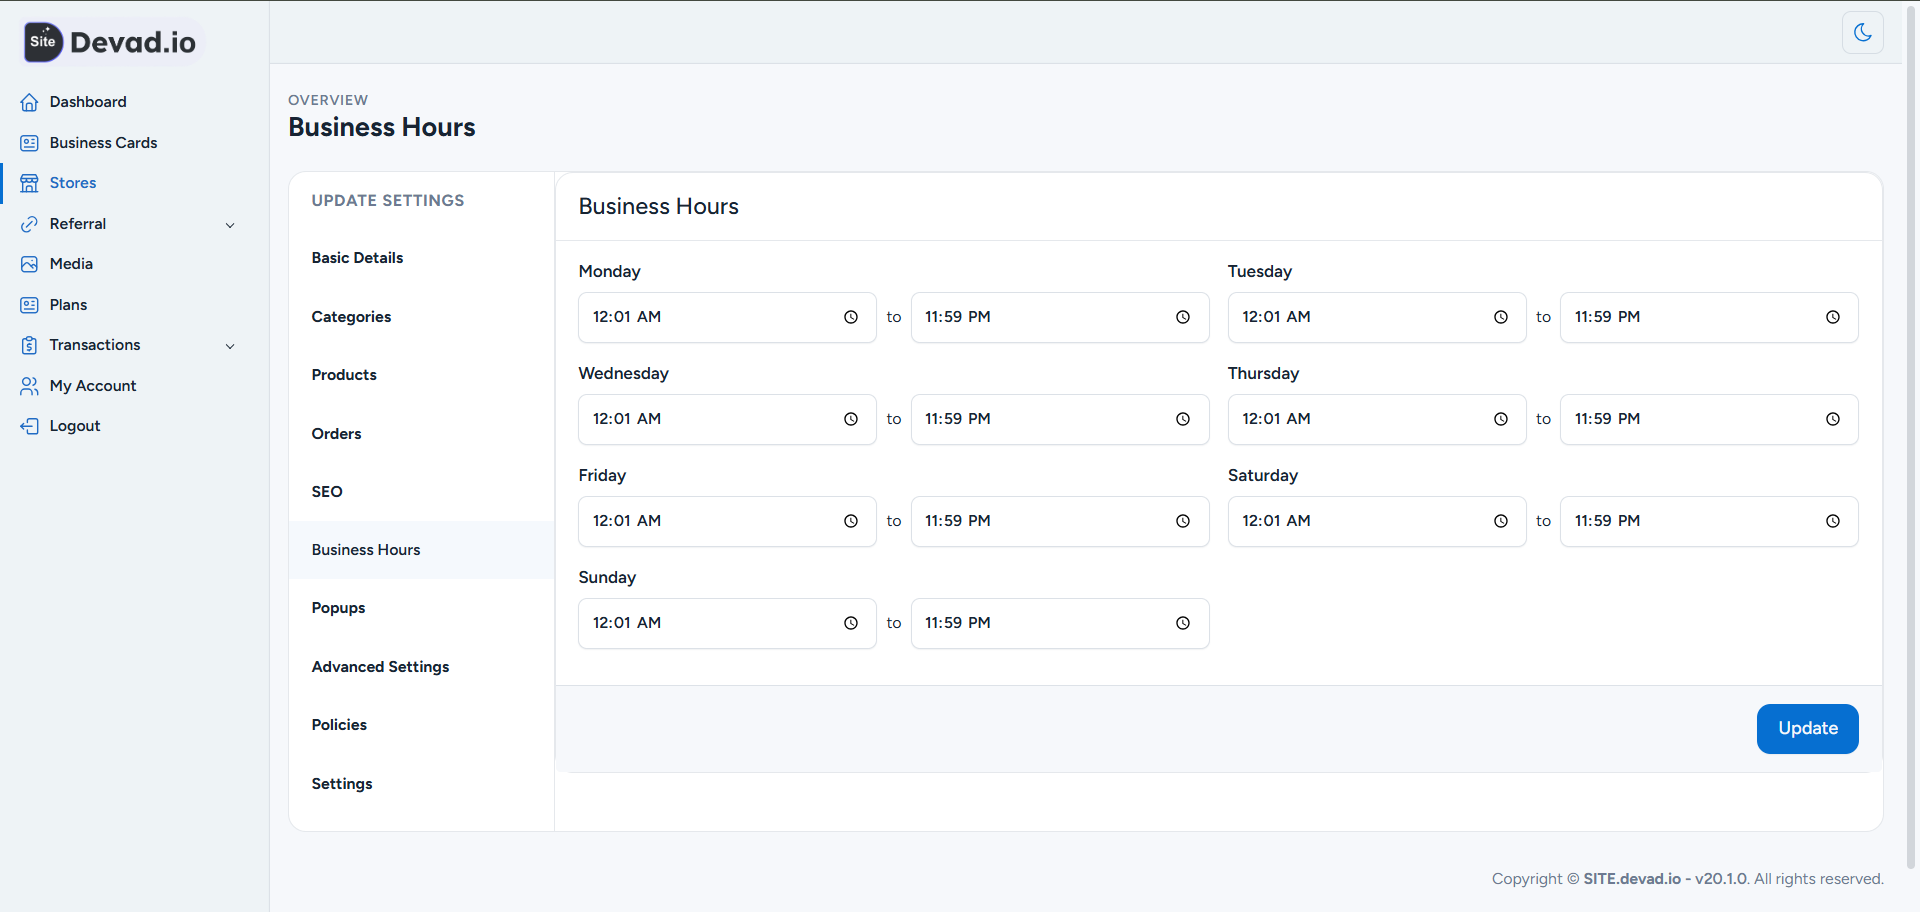
Add the working hours to let customers know your business availability.
Step 6: Manage Popups
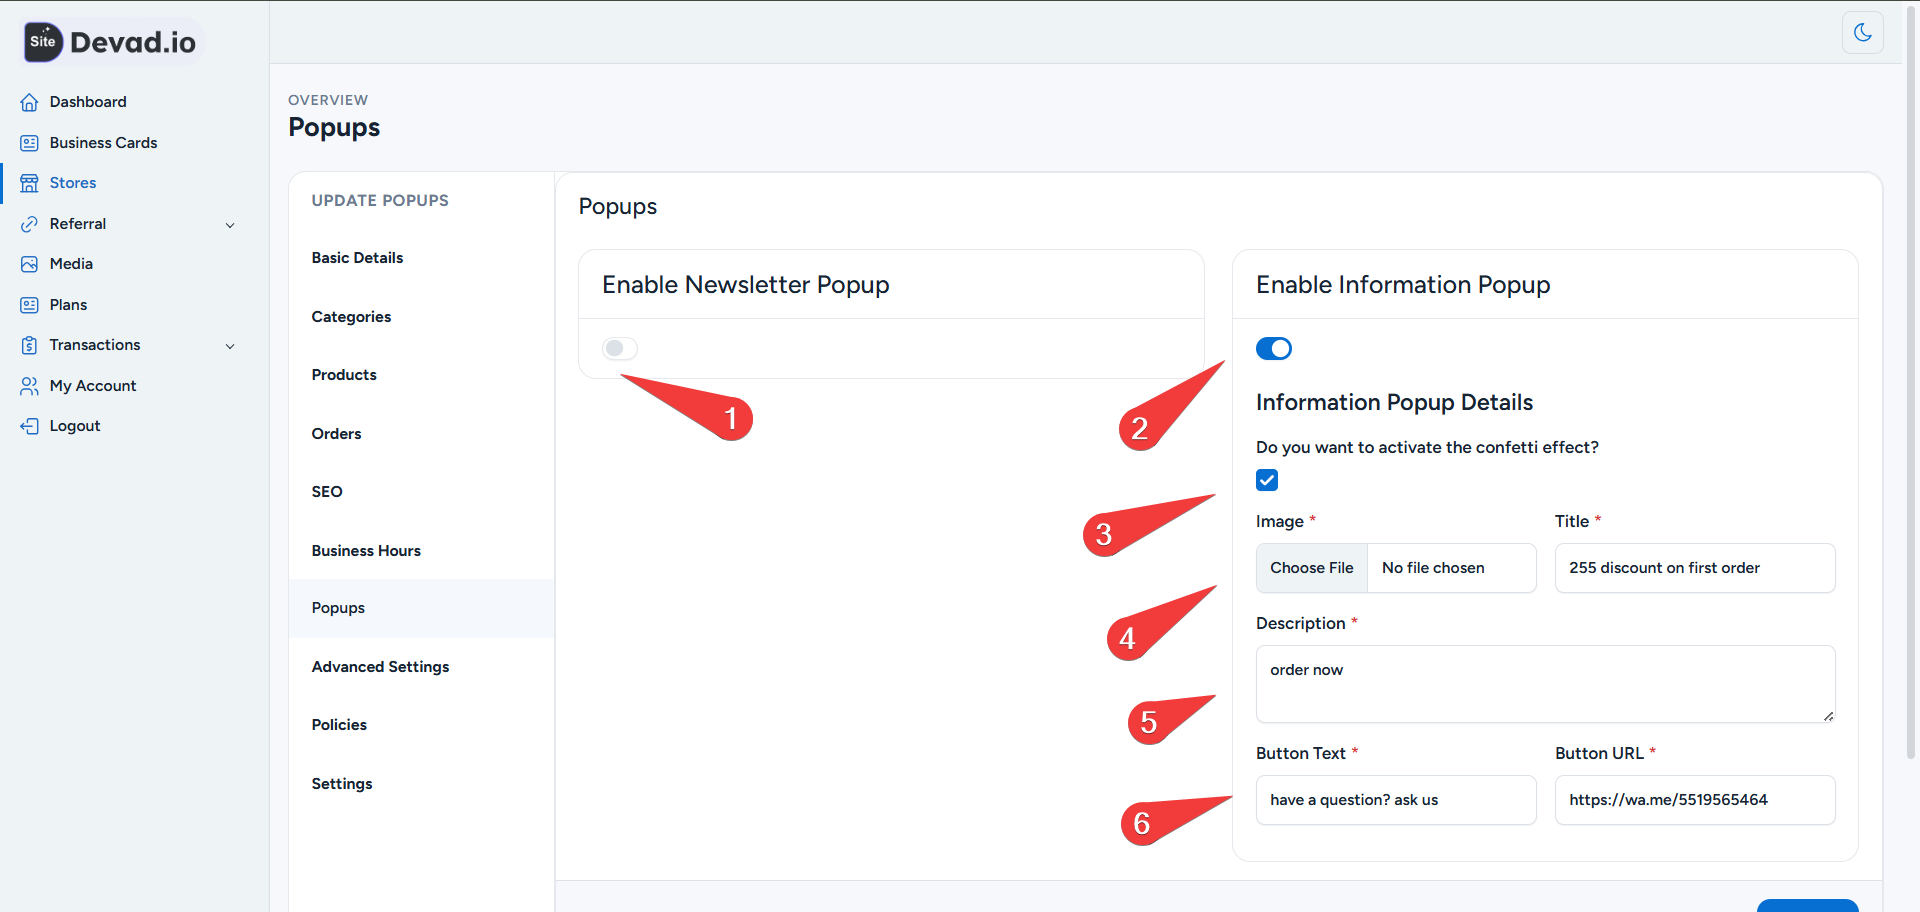
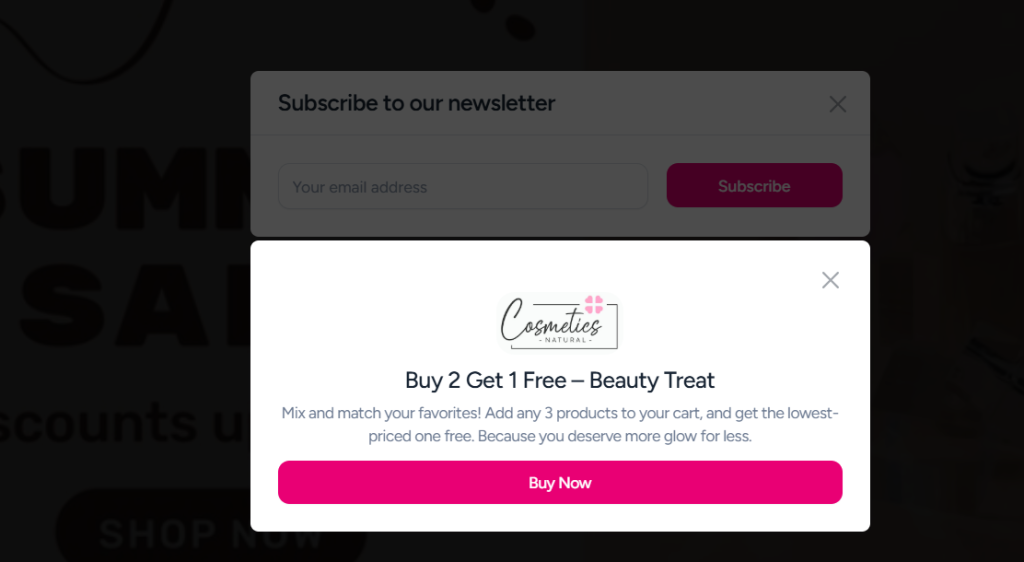
1- Optionally, enable Newsletter Popup
2- Optionally, enable Information Popup
3- Activate the confetti effect
4- Add rectangle logo and title
5- Add a short description to the popup
6- Add the Button Text and link (you can use a product link or WhatsApp link)
Step 7: Advanced Settings
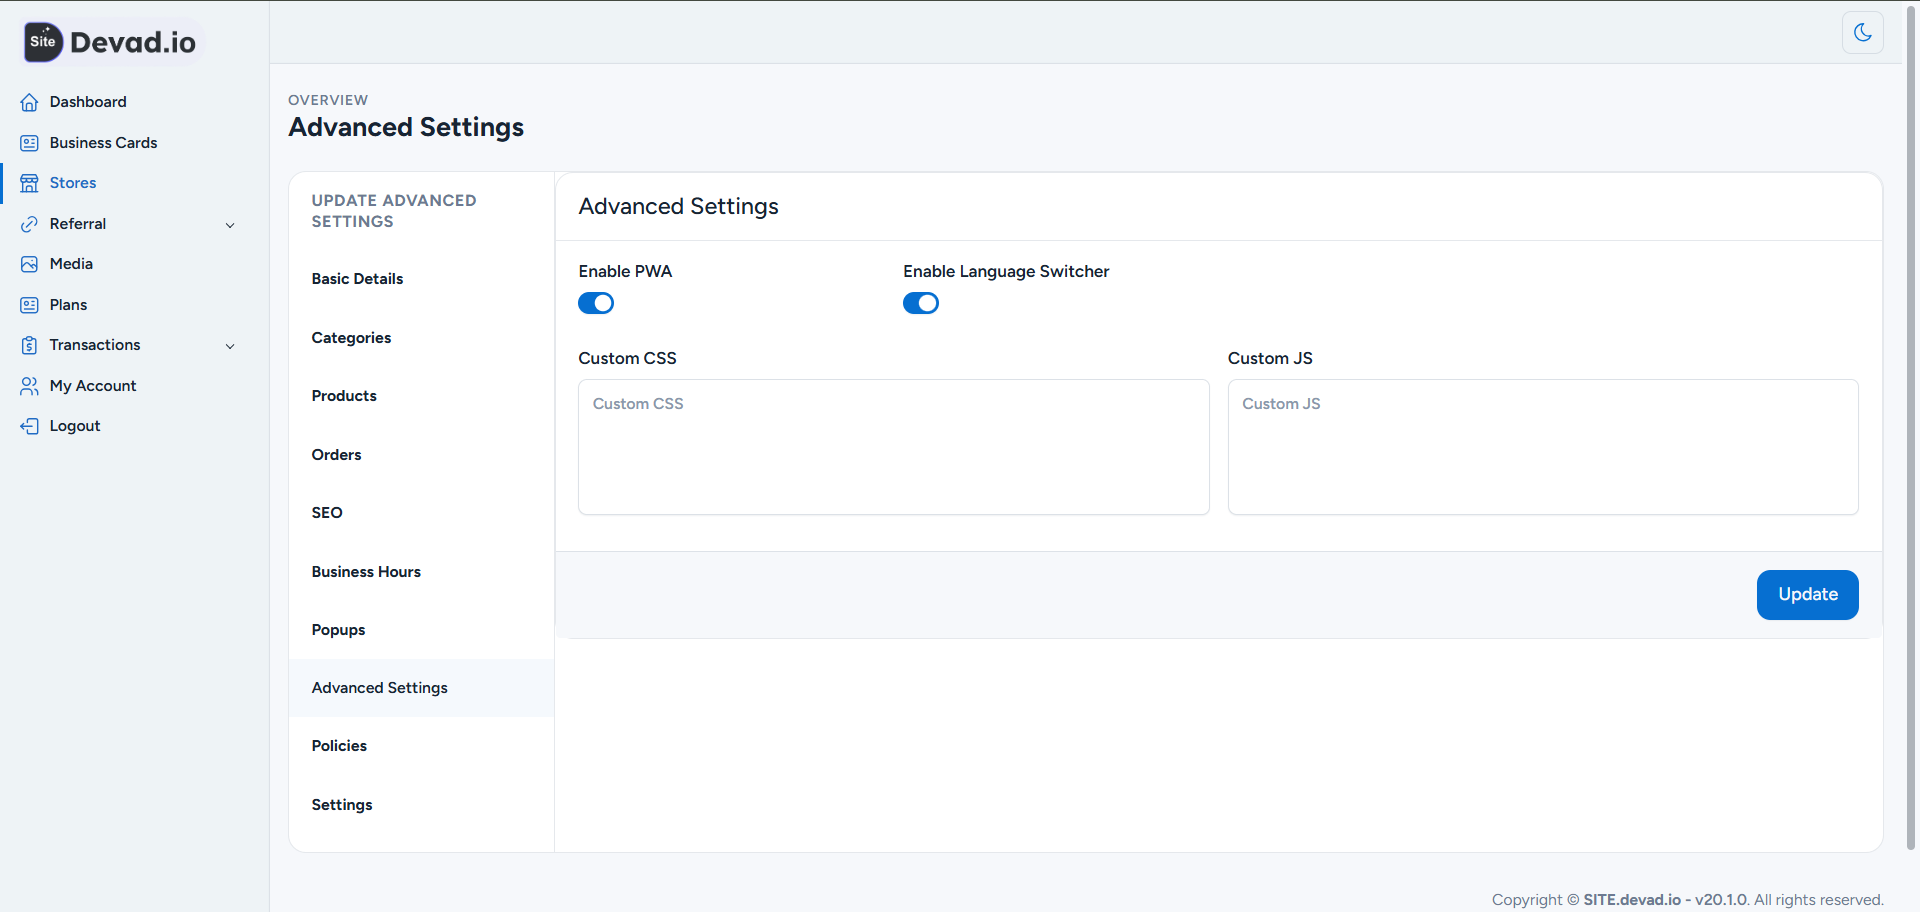
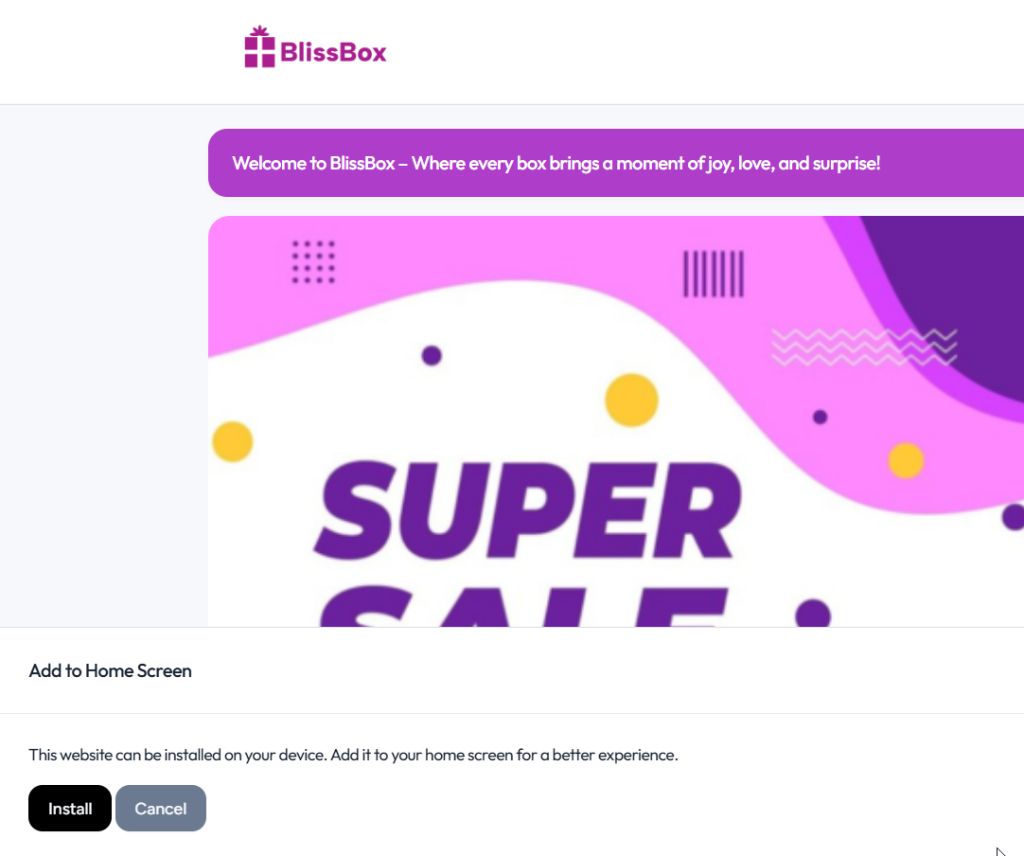
1- Enable PWA (Allows users to easily install your website onto their device’s home screen, just like a native app)
2- Enable Language Switcher to allow a multi-lingual store
3- Customize your store frontend via the Custom CSS section
4- Add Custom JS like Pixel or Google Analytics.
Step 8: Add Store Policies
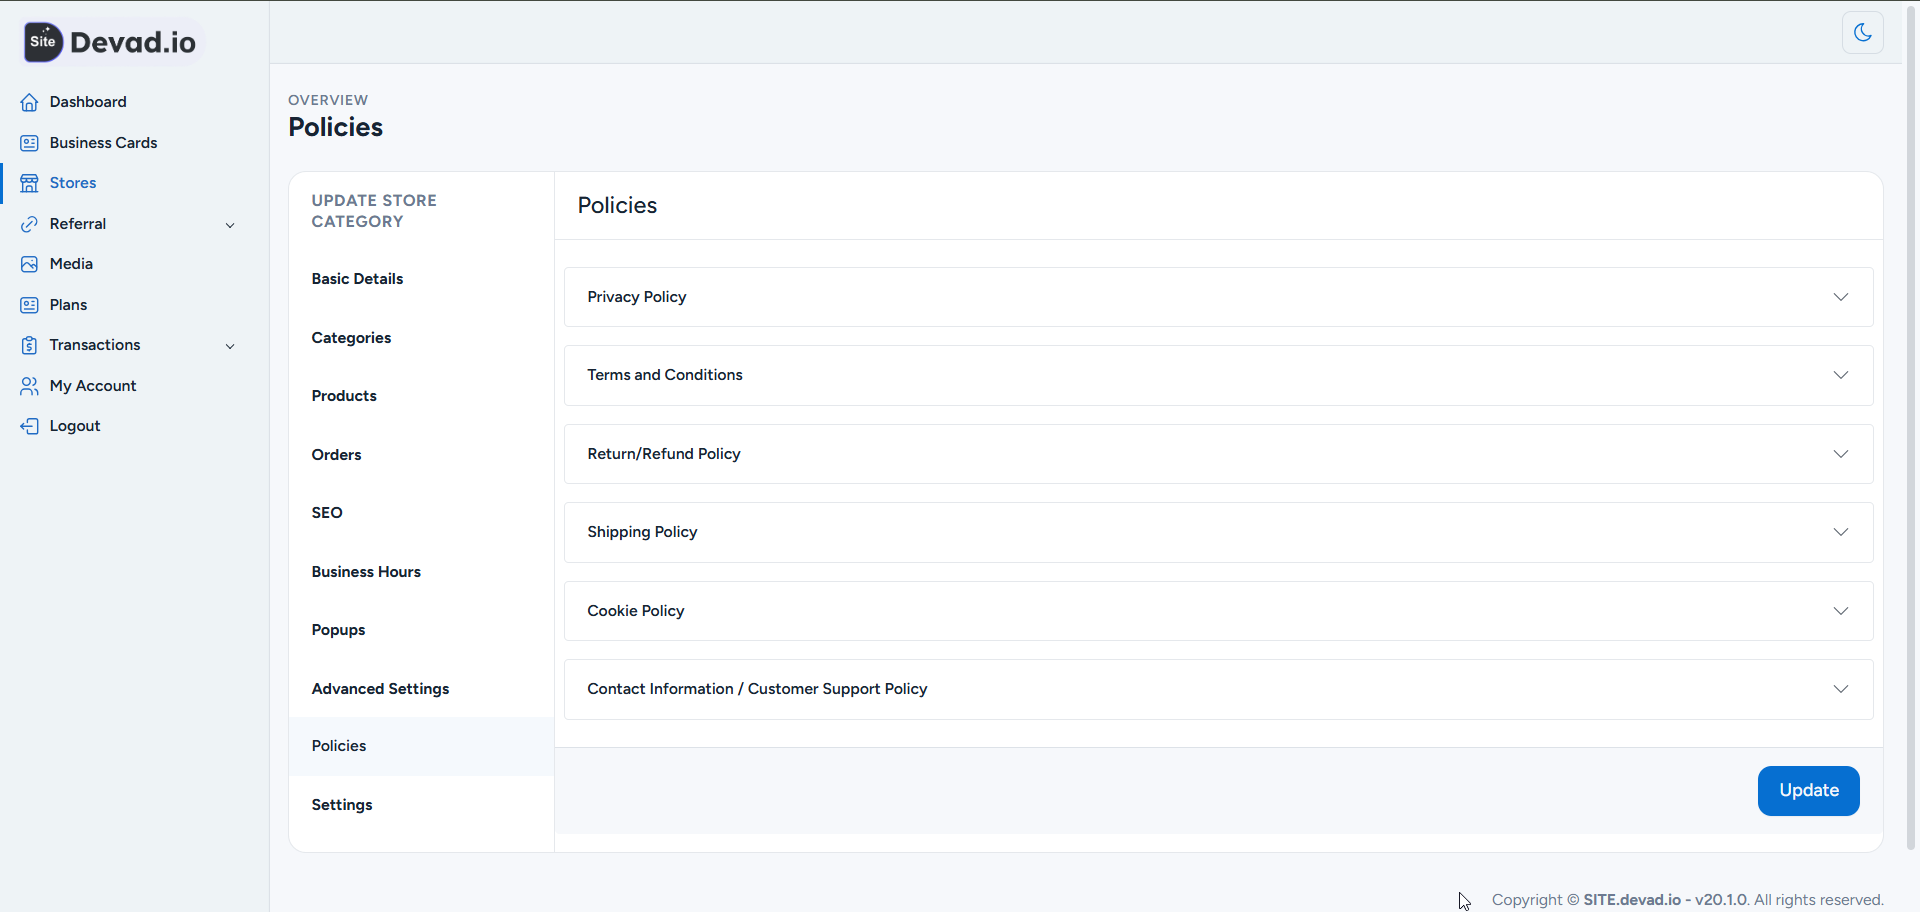
Add policies: Privacy Policy, Terms and Conditions, Return/Refund Policy, Shipping Policy, Cookie Policy, Contact Information / Customer Support Policy
Step 9: Settings
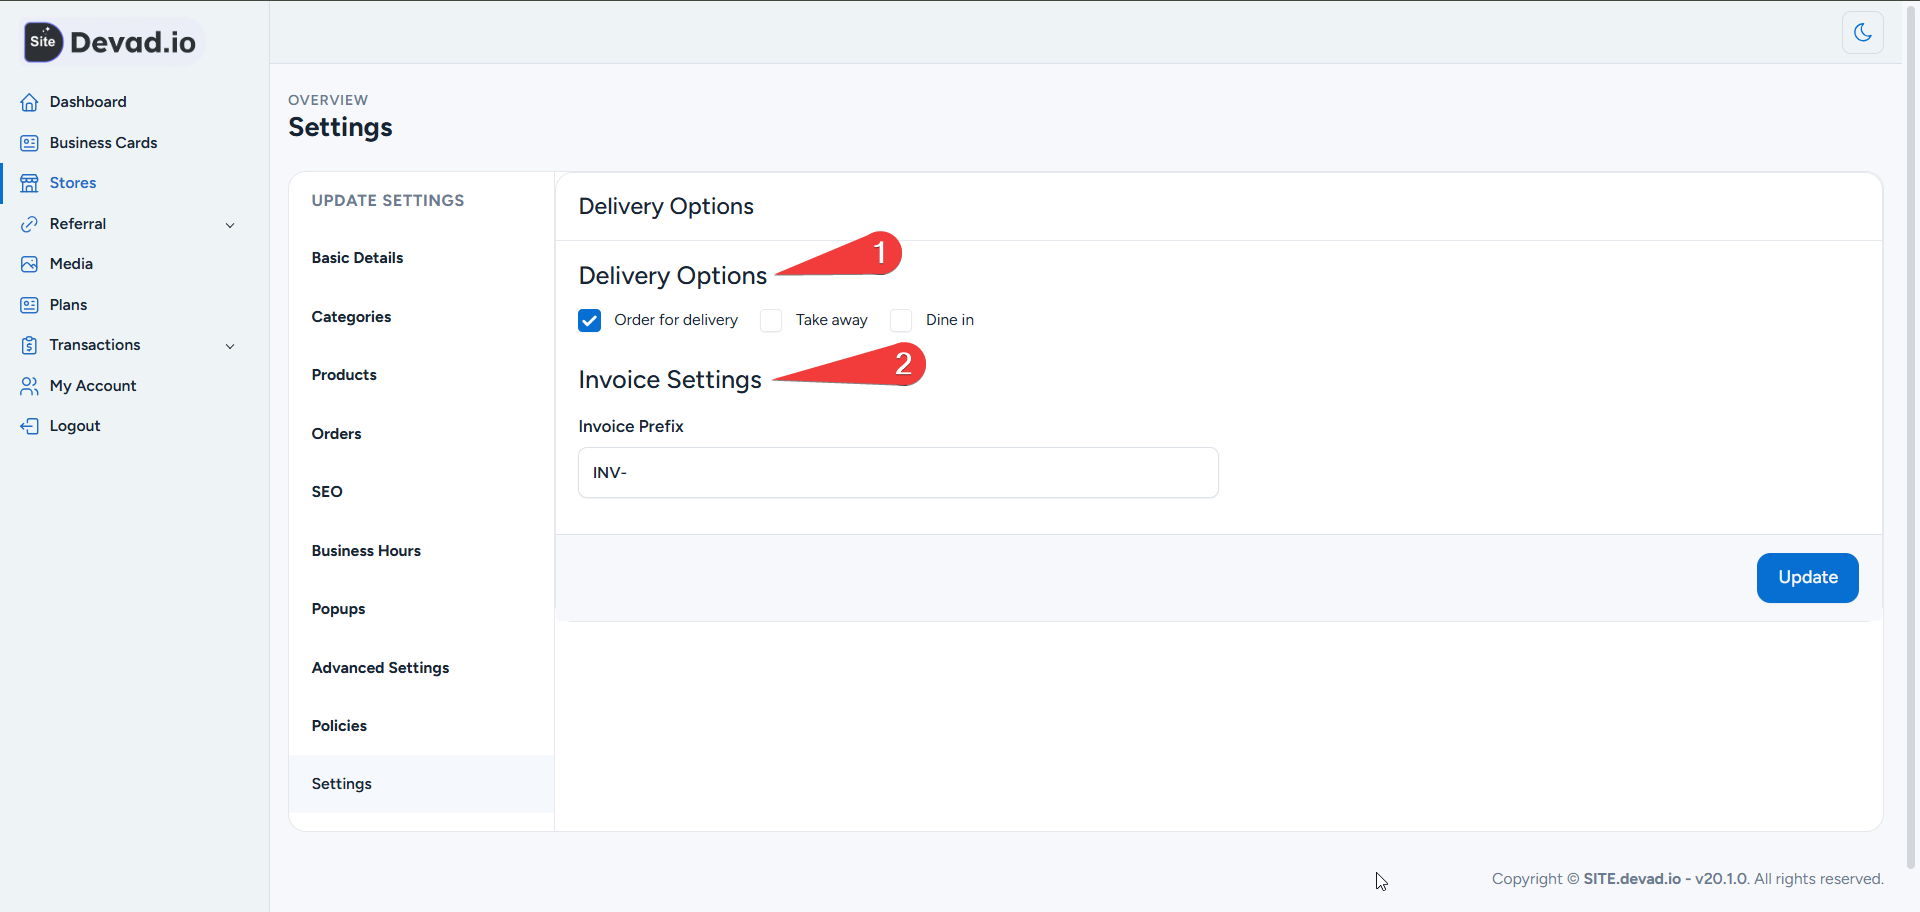
1- Choose Delivery Options: Delivery, Dine-in, Takeaway
2- Set invoice prefix
Step 10: Connect to Your Domain or Subdomain
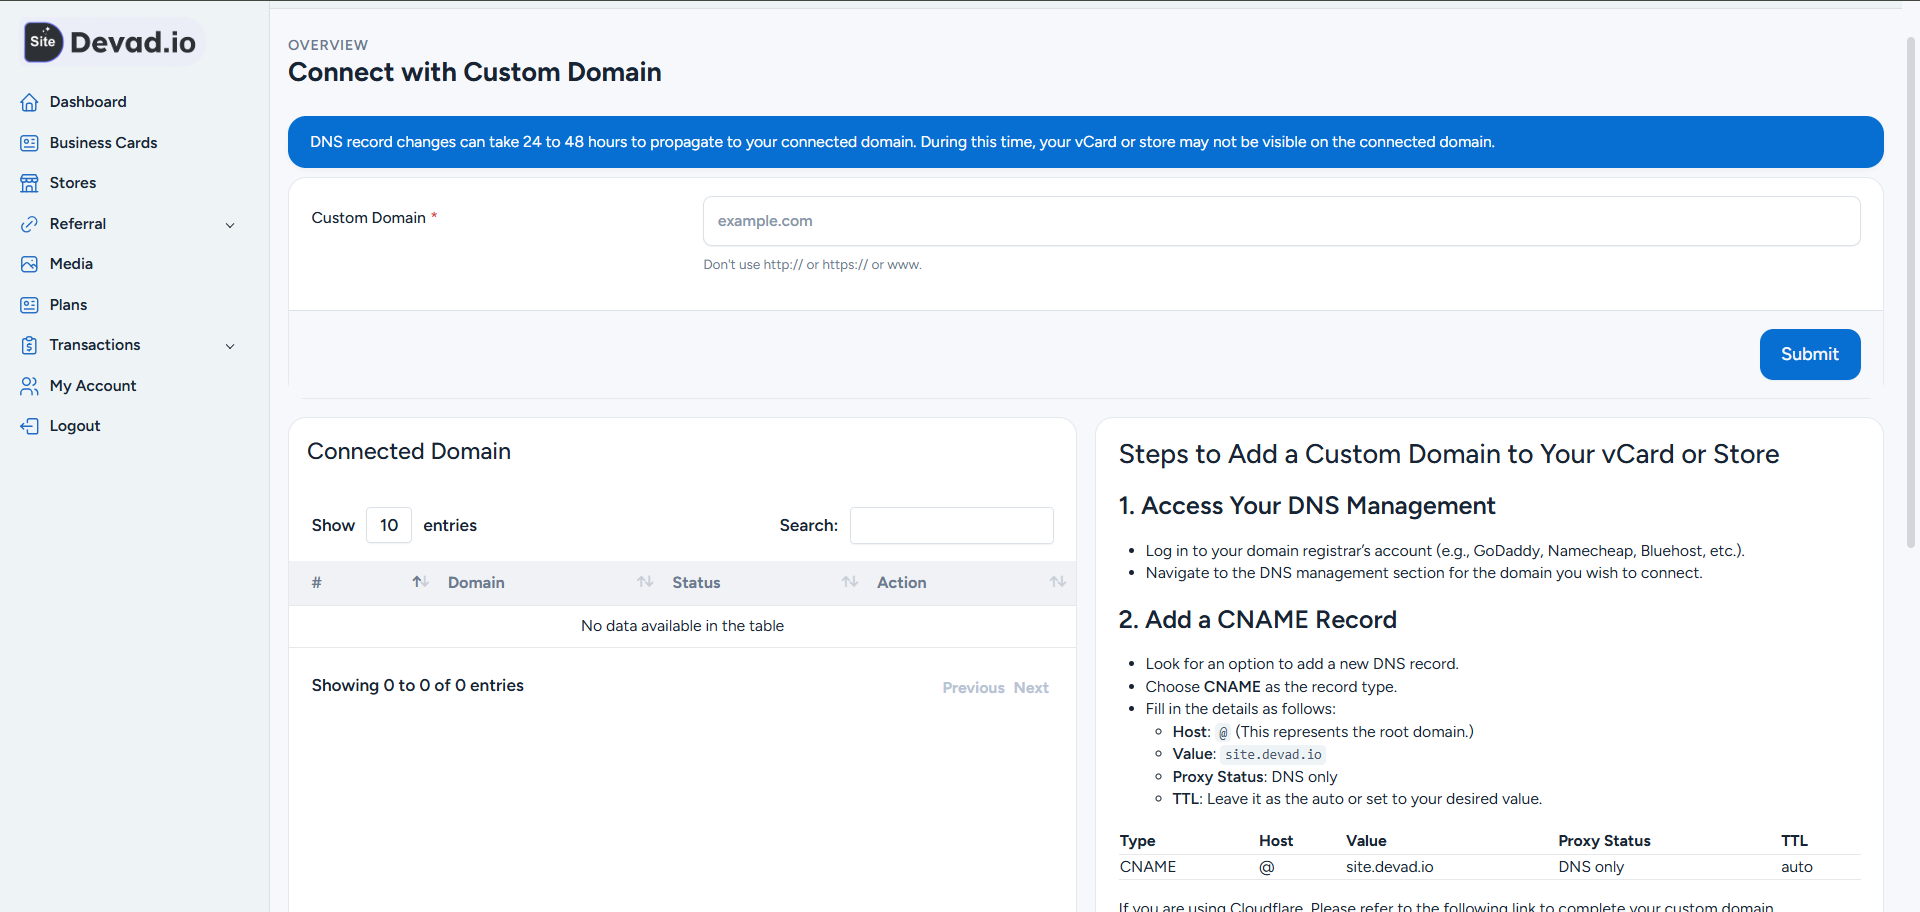
1- From page actions, click Connect.
2- For our free subdomain: Only add your desired subdomain name + mufidx.net (e.g., storez.mufidx.net). If the subdomain is available, we will approve it ASAP.
2- For your own domain, please follow the instructions below.