Introduction
In this comprehensive guide, we will explore how to create and manage a professional charity website using Theme Eleven on the web.devad.io platform. This guide covers all aspects of charity website management, from initial setup to donation tracking and campaign management. Whether you’re a nonprofit administrator or a website developer, this documentation provides step-by-step instructions to build an effective online presence that drives donations and increases community engagement.
Part 1: Initial Setup
Step 1: Activating Theme Eleven (Charity Theme)
Path 1: Selecting Theme Eleven from Available Templates

- Log in to your admin dashboard at
https://web.devad.io/user/dashboard - Navigate to Settings > Themes via the sidebar menu
- In the Theme Settings section, locate the Theme Eleven preview tile (labeled “Theme Eleven”)
- Click the radio button associated with
home_eleven - Scroll to the bottom of the form and click Update
Note: Theme Eleven is specifically designed for charity and nonprofit organizations. Activating this theme will enable all charity-specific features including donation management, cause campaigns, and volunteer registration systems.
Step 2: Accessing Charity Management Module
Path 1: Navigating to Donation Management
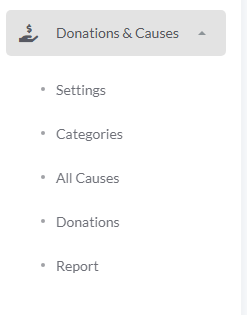
- After theme activation, locate Donations & Causes in the sidebar menu
- Click the caret icon next to “Donations & Causes” to expand the submenu
- The system displays the following management sections:
- Settings: General charity configuration
- Categories: Cause categorization
- All Causes: Individual campaign management
- Donations: Donation tracking and reporting
- Report: Performance analytics and statistics
Note: The Donations & Causes module only appears after successfully activating Theme Eleven or when the donation system is enabled in settings. If missing, verify theme selection and refresh your browser cache.
Part 2: Essential Configuration
Step 1: Configuring Charity Settings
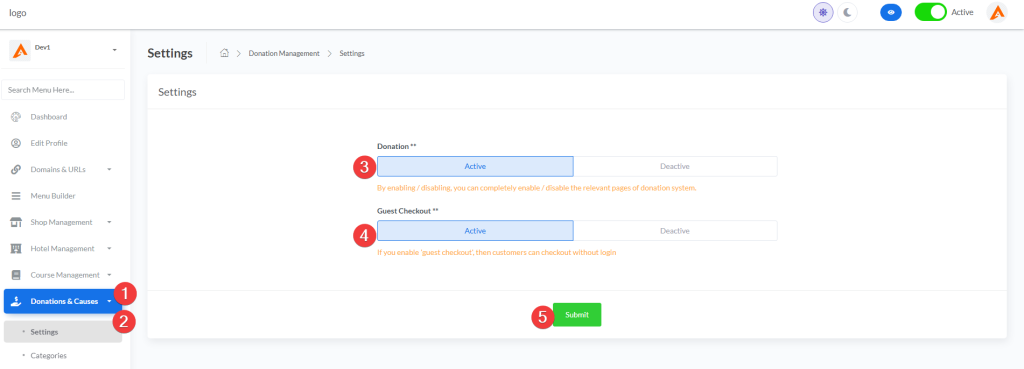
- From the expanded Donations & Causes menu, click Settings
- Configure the following essential settings:
- Donation Status: Select “Active” to enable the donation system on your website
- Guest Checkout: Choose whether visitors can donate without creating an account
- Active: Increases conversion rates but collects less donor data
- Deactive: Builds your donor database but may reduce impulse donations
- Click Submit to save all settings
Note: Enabling guest checkout significantly increases donation completion rates. Consider this setting carefully based on your organization’s data collection needs versus conversion optimization goals.
Step 2: Creating Cause Categories
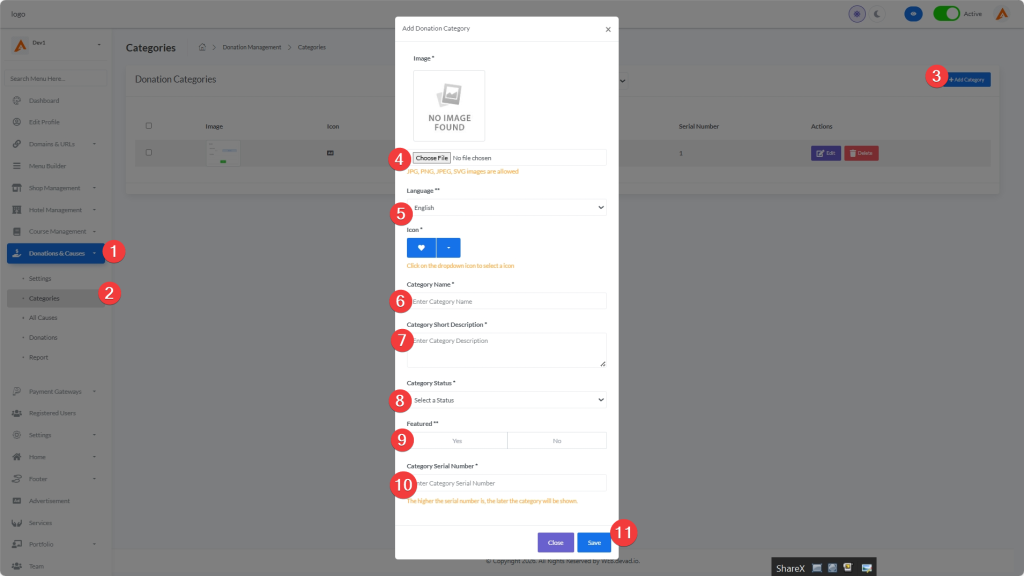
- From the Donations & Causes menu, select Categories
- Click the Add Category button (top-right corner)
- Complete the category creation form:
- Language: Select your target language
- Name: Enter a descriptive category name (e.g., “Education”, “Healthcare”, “Disaster Relief”)
- Status: Choose “Active” to make it visible immediately
- Serial Number: Set display priority (lower numbers appear first)
- Click Submit to create the category
Best Practice: Create 3-5 core categories that align with your organization’s mission areas. This creates a clear navigation structure for donors while preventing category overload.
Step 3: Adding Individual Causes
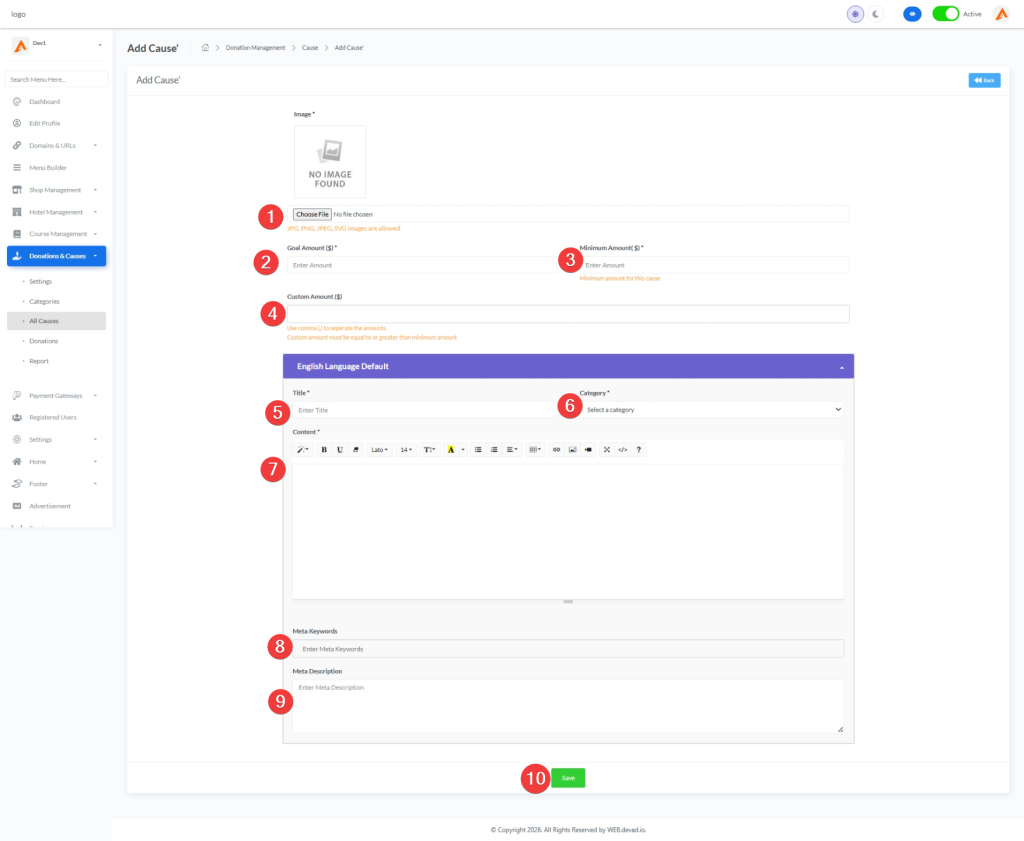
- From the Donations & Causes menu, select All Causes
- Click the Add Charity button (top-right corner)
- Complete the comprehensive cause form:
Basic Information
- Title: Create a compelling campaign title
- Category: Assign to an appropriate category
- Goal Amount: Set a specific fundraising target
- End Date: Specify campaign duration
- Status: Choose between “Active”, “Completed”, or “Upcoming”
Visual Elements
- Featured Image: Upload a high-quality, emotionally resonant image
- Slider Images: Add additional images showing the cause impact
- Video URL: Include a YouTube or Vimeo link for campaign videos
Content Sections
- Short Description: Brief summary for listings
- Full Description: Detailed explanation of the cause, impact, and fund usage
- Impact Metrics: Quantifiable outcomes (e.g., “Provide clean water for 100 families”)
SEO Settings
- Meta Keywords: Relevant search terms
- Meta Description: Concise summary for search engine results
- Click Submit to publish the cause
Pro Tip: Use compelling storytelling with specific examples of impact. Include images of real beneficiaries (with permission) to increase donor engagement and trust.
Part 3: Advanced Charity Features
Step 1: Managing Donations
Path 1: Processing and Tracking Donations

- From the Donations & Causes menu, select Donations
- The system displays all donations in a comprehensive table showing:
- Donor information
- Associated cause
- Donation amount
- Payment status
- Date and time
- For individual donation management:
- View Details: Click on any donation to see complete information
- Print Receipt: Generate tax receipts for donors
- Export Data: Download donation records for accounting purposes
- Use filters to view donations by:
- Date range
- Cause category
- Payment status
- Amount range
Best Practice: Establish a weekly routine to review donations, send thank-you emails, and update donors on campaign progress. Personalized communication significantly increases donor retention.
Step 2: Configuring Payment Gateways
Path 2: Setting Up Payment Processing
- From the sidebar menu, navigate to Payment Gateways > Online Gateways
- Configure your preferred payment processors:
- PayPal: Enter API credentials and set up recurring donations
- Stripe: Connect your account for credit card processing
- Bank Transfer: Provide account details for direct transfers
- For each gateway:
- Toggle status to “Active” to enable it
- Complete required credential fields
- Set as default gateway if desired
- Save your configuration
Security Note: Never share API credentials or admin passwords. Regularly review active sessions and log out after managing sensitive payment settings.
Step 3: Creating Donation Reports
Path 3: Generating Analytics and Reports
- From the Donations & Causes menu, select Report
- Configure report parameters:
- Date Range: Select specific period or choose preset options
- Causes: Filter by specific campaigns or view all
- Status: Include only completed donations or all statuses
- Generate reports showing:
- Total donations amount
- Number of donors
- Average donation size
- Cause performance comparison
- Donor retention metrics
- Export reports as PDF or CSV for board meetings and grant applications
Strategic Tip: Analyze donation patterns to identify your most successful campaigns and donor segments. Use this data to optimize future fundraising efforts and resource allocation.
Part 4: Public-Facing Website Configuration
Step 1: Setting Up the Homepage
Path 1: Configuring Charity Homepage Elements
- Navigate to Home in the sidebar menu
- Configure key homepage sections:
- Hero Section: Upload impactful images and create compelling headlines
- About Section: Share your organization’s mission and impact
- Counter Information: Display key statistics (e.g., “10,000 Lives Changed”)
- Featured Causes: Highlight your most urgent campaigns
- Testimonials: Add donor and beneficiary stories
- For each section:
- Toggle visibility on/off
- Upload media assets
- Enter descriptive content
- Set display order
Conversion Tip: Place your most compelling call-to-action in the hero section with a prominent donation button. Research shows this increases conversion rates by up to 27%.
Step 2: Configuring Donation Forms
Path 2: Optimizing the Donation Experience
- Navigate to Donations & Causes > Settings
- Configure donation form options:
- Suggested Amounts: Set predefined donation tiers (e.g., $25, $50, $100)
- Custom Amount: Allow donors to enter their own amount
- Recurring Options: Enable monthly/yearly donation choices
- Cover Fees: Allow donors to cover processing fees
- Dedication Options: Enable dedicating donations to others
- Add custom form fields if needed:
- Tribute Type (In Memory Of/In Honor Of)
- Company Matching information
- Communication Preferences
- Save your form configuration
User Experience Tip: Minimize form fields to essential information only. Each additional field decreases completion rates by approximately 15%.
Step 3: Setting Up Volunteer Registration
Path 3: Creating Volunteer Opportunities
- Navigate to Custom Page > Create Page
- Create a dedicated volunteer registration page:
- Page Title: “Join Our Volunteer Team”
- URL Slug: “volunteer”
- Content: Describe volunteer opportunities and impact
- Add a volunteer registration form:
- Basic contact information
- Areas of interest
- Skills and experience
- Availability
- Emergency contact
- Configure email notifications to alert staff of new volunteer sign-ups
- Publish the page and add it to your menu via Menu Builder
Engagement Tip: Create specific volunteer roles with clear time commitments and responsibilities. Donors who also volunteer have a 63% higher lifetime value than donors alone.
Part 5: Marketing and Communication
Step 1: Configuring Email Communications
Path 1: Setting Up Automated Email Campaigns
- Navigate to Settings > Email Settings > Mail Templates
- Customize essential email templates:
- Donation Confirmation: Immediate receipt after donation
- Thank You Email: Personalized message 24 hours after donation
- Campaign Updates: Progress reports to donors
- Volunteer Welcome: Information for new volunteers
- For each template:
- Edit subject line and content
- Insert dynamic variables (donor name, donation amount, etc.)
- Add organization logo and branding
- Test email templates before going live
Compliance Note: Ensure your email templates include unsubscribe options and comply with relevant regulations (CAN-SPAM, GDPR, etc.).
Step 2: Setting Up Social Media Integration
Path 2: Connecting Social Channels
- Navigate to Settings > Social Links
- Connect your organization’s social media accounts:
- Facebook: Organization page URL
- Instagram: Profile handle
- Twitter/X: Account username
- LinkedIn: Organization page
- YouTube: Channel URL
- Enable social sharing for causes:
- Add sharing buttons to cause pages
- Customize share text for each platform
- Add tracking parameters to measure referral traffic
- Save your social settings
Engagement Strategy: Create a content calendar that aligns your website campaigns with social media posts. Organizations with consistent cross-platform messaging see 47% higher conversion rates.
Part 6: Advanced Features and Optimization
Step 1: Setting Up Recurring Donations
Path 1: Creating Subscription Campaigns
- Navigate to Donations & Causes > All Causes
- Create a new cause specifically for recurring donations:
- Title: “Monthly Support Circle”
- Description: Emphasize the impact of sustained giving
- Goal Amount: Set annual target (e.g., “$120,000 annually = 100 donors giving $100/month”)
- Configure payment gateway settings:
- Enable recurring payment options in PayPal/Stripe
- Set available frequencies (monthly, quarterly, annually)
- Create tiered giving levels with specific impacts:
- $25/month: Provides school supplies for one child
- $50/month: Funds healthcare for a family
- $100/month: Supports educational programs
Retention Tip: Implement a donor retention strategy for recurring donors including quarterly impact reports, exclusive updates, and annual recognition events.
Step 2: Implementing Event Management
Path 2: Creating Fundraising Events
- Navigate to Custom Page > Create Page
- Create an event listing page:
- Page Title: “Upcoming Events”
- URL Slug: “events”
- For each event, create a dedicated page:
- Event name, date, and location
- Description and purpose
- Registration/ticket options
- Image gallery
- Connect event registration to your donation system:
- Set ticket prices as donation amounts
- Create sponsorship tiers
- Enable additional donation options during registration
- Promote events across your website and email communications
Revenue Tip: Events with online registration and donation options raise 3.2x more funds than events without integrated digital tools.
Best Practices for Charity Website Management
Data Privacy and Compliance
- Implement GDPR/CCPA compliance for donor data
- Create a transparent privacy policy explaining data usage
- Regularly audit user permissions and data access
- Encrypt sensitive donor information in your database
Performance Monitoring
- Set up Google Analytics to track donation funnel performance
- Monitor page load speed (aim for under 3 seconds)
- Track mobile vs. desktop conversion rates
- Set up goal tracking for key conversions
Content Strategy
- Publish impact stories monthly showing donation outcomes
- Create annual reports with financial transparency
- Develop educational content related to your cause
- Maintain an active blog with organizational updates
Community Building
- Create donor recognition sections on your website
- Enable donor comments and interaction on cause pages
- Develop supporter spotlights featuring dedicated donors
- Implement a points/rewards system for frequent donors
