Skip to content
Devad.io

SITE Docs

SITE documentation for setup, operations, automations, integrations, and support workflows.

16 min read3520 words

WEB App

How to add analytics / pixel tools and customizing the design

Enhance your Business Page or WhatsApp Store by adding analytics tools and customizing the design with your own CSS or JavaScript. This guide explains how to connect all major tracking platforms and where to place custom code using the built-in Advanced Settings section.

How to Add Analytics to Your Business Page or WhatsApp Store

You can easily integrate Google Analytics, Meta Pixel, Google Ads Conversion Tag, GTM, Snapchat Pixel, or any third-party script by pasting the tracking code inside the Analytics field found in each page or store settings.

Open your Business Page or WhatsApp Store settings → scroll to Analytics. You will find a field to paste your tracking scripts. This field accepts GA4, Pixel, Ads Tag, GTM, TikTok Pixel, Snap Pixel, and more.
Open Google Analytics → Admin → Data Streams → Web → “Install Tag”. Copy the GA4 script and paste it inside the Analytics field of your page or store.
Open Meta Events Manager → Data Sources → Pixel → Install Code Manually. Copy your Pixel script and paste it into the Analytics field.
Go to Google Ads → Tools → Conversions → Choose Web → Install Code. Copy the conversion tag and event snippet and paste them inside the same Analytics field.
Open GTM → Admin → Install GTM. Copy both the and GTM codes and paste them directly into the Analytics field.
Go to the platform’s Pixel Manager → Copy your Pixel Code → paste it in the Analytics field. All standard marketing pixels are supported.

Here is an example of how a GA4 script looks when pasted:

 
💪
Most analytics tools require no extra setup. Just paste the script and publish your page or store to activate tracking.

How to Customize Design Using Custom CSS or JS

You can customize the appearance and behavior of any Business Page or WhatsApp Store using the built-in Custom CSS / Custom JS options found inside the Advanced Settings panel.

Open the page or store you want to edit → look for Advanced Settings. You will see two fields: Custom CSS and Custom JS.
Use this field to change colors, adjust spacing, hide elements, or add advanced styling. No additional tools are required.
Use this field to add small scripts that modify behavior, trigger animations, or interact with analytics tools. Only lightweight JS is recommended.

Examples of custom code you can add:

/* change button colors */ .button-primary { background: #ff6600; color: #fff; }
// simple JS example document.addEventListener("DOMContentLoaded", function(){ console.log("Custom script is active"); });
💡
Custom code applies only to the specific page or store you edit, which makes it safe and flexible without affecting your entire account.

Do I need coding skills?

No. You only need to paste the tracking script provided by your analytics platform. Custom CSS/JS is optional.

Will analytics slow down my page?

No. All scripts load asynchronously, which keeps the page fast.

Can I remove the code later?

Yes. Simply clear the field inside the Analytics or Custom CSS/JS section and save.
✔️
Your analytics and customization changes apply instantly after saving. No extra deployment or plugin installation is required.


Setup & Basics

How to connect to you domain with Landing page or Store

Connecting a custom domain to your Business Page or Store ensures a professional brand presence and improved SEO performance. This guide covers every major domain provider and explains each method clearly so you can complete the setup without confusion.

Full Guide: How to Add a Custom Domain to Your Business Page or Store

Below you will find detailed steps for Cloudflare, GoDaddy, Namecheap, and other popular registrars. Each section includes screenshots, official videos, recommended configurations, and troubleshooting notes to help you connect your custom domain successfully.

1. Access Your DNS Management Panel

Log in to your domain provider account and open the DNS settings section for the domain you want to use. Depending on your provider, this section may be labeled as DNS Management, Zone Editor, Advanced DNS, or DNS Records.

2. Add the Required CNAME Record

To connect your domain, you must create a CNAME record with the following values:

Type: CNAME Host: @ Value: site.devad.io Proxy: DNS Only TTL: Auto

Some providers call the Host field “Name”, “Alias”, or “Record Name”. If your provider does not allow @ for CNAME at the root, use the “www” version instead and set up a redirect.

3. Save Your Changes

After saving the new record, DNS propagation usually takes between 5 minutes and 1 hour. In some rare cases, it may take up to 24 hours depending on your DNS provider.

4. Add the Domain Inside Your Business Page or Store

Return to your Business Page or Store settings and enter the domain you configured (e.g., yourdomain.com). Once submitted, your request will be processed by the website admin. During this time, your status may appear as Pending.

5. Important Notes

Each domain provider has different interfaces and terminology. If something looks different from this guide, check your registrar’s documentation, as they often provide step-by-step visuals.

💪
If you already use Cloudflare, please follow Cloudflare’s specific instructions — especially the rules regarding “DNS Only” Proxy Mode and required SSL settings.

Provider-Specific Instructions

Cloudflare is the most flexible DNS provider and recommended if you need full control or accelerated DNS performance.

Steps:

Log into Cloudflare and select your domain.

Open the DNS tab.

Click “Add Record”.

Choose CNAME.

Set Name = @

Set Target = site.devad.io

Change proxy to DNS Only (grey cloud)

Save.

CNAME @ → site.devad.io Proxy Status: DNS Only TTL: Auto
💡
Cloudflare requires “DNS Only” mode because proxied (orange cloud) interferes with domain verification and routing.
https://www.youtube.com/watch?v=Ytr7R_BN0JY
GoDaddy uses a simple DNS manager and is one of the easiest platforms for beginners.

Steps:

Log into GoDaddy → “My Products”.

Find your domain → “DNS”.

Scroll to “Records” → Add.

Choose CNAME.

Host: @

Points to: site.devad.io

TTL: 1 hour or Default

Save.

Type: CNAME Host: @ Points to: site.devad.io
Namecheap uses “Advanced DNS” where most custom records are configured.

Steps:

Log into Namecheap → Domain List.

Click “Manage” → “Advanced DNS”.

Under “Host Records”, click “Add New Record”.

Choose CNAME Record.

Host: @

Value: site.devad.io

TTL: Auto.

Save.

Some Namecheap plans do not allow root domain CNAME. Use “www” instead and set URL Redirect for @ → www.[/epcl_box
]
Most traditional hosting companies use the same cPanel interface.

Steps:

Log into cPanel.

Search “Zone Editor”.

Choose your domain → “Manage”.

Click “Add Record”.

Type: CNAME.

Name: @

Record: site.devad.io

Save.

For registrars like IONOS, OVH, Domain.com, Google Domains (legacy), or Shopify Domains — the process is identical:

Open DNS or Zone Editor.

Add new record.

Type: CNAME.

Host: @.

Target: site.devad.io.

Save.

If your provider does not support CNAME on root, add:

www → CNAME → site.devad.io

Then redirect the main domain (“@”) to “www”.

Troubleshooting & FAQs

My domain is not verifying?

Make sure your CNAME is set to “DNS Only” and propagation has completed. Cloudflare users especially must disable proxy mode.

Can I use HTTPS?

Yes. SSL is handled automatically after verification. Just give it time to activate after DNS is correct.

What if my provider blocks root CNAME?

Use “www” as your CNAME and redirect root → www using Provider → Redirect rules.

Final Steps

After adding your CNAME record, return to your Business Page or Store admin area and submit the custom domain. Your request will be processed by the administrator and typically completed within a short time window.

✔️
Your custom domain will activate automatically once DNS is correct and the admin finalizes approval.

Portfolio Showcase Theme – Complete Setup Guide

Get your professional portfolio website up and running in minutes with our comprehensive setup guide. This document walks you through each essential step to create a stunning portfolio showcase that impresses clients and simplifies project management.

Admin Role

This section details the essential configuration steps required to activate and prepare Theme Twelve for portfolio management. It includes theme selection, category setup, and foundational content workflows tailored for the Portfolio Owner role.


Step 1: Activating Theme Twelve

Path 1: Selecting Theme Twelve from Available Templates

  1. Log in to your admin dashboard at https://web.devad.io/user/
  2. Navigate to Settings > Themes via the sidebar menu
  3. In the Theme Settings card, locate the Theme Twelve preview tile (labeled “Theme Twelve”)
  4. Click the radio button associated with home_twelve
  5. Scroll to the bottom of the form and click Update

Note: Only one theme can be active at a time. Activating Theme Twelve will immediately apply its layout, styles, and portfolio-specific features across the frontend.


Step 2: Managing Portfolio Categories

Portfolio categories are used to group and filter projects on the public portfolio page. Proper categorization enhances visitor navigation and SEO structure.

Path 1: Adding a New Portfolio Category

  1. From the dashboard sidebar, go to Portfolio > Category
  2. Click the Add Portfolio Category button (top-right corner)
  3. In the modal form, complete the following fields:
    • Language: Select the target language (e.g., English)
    • Name: Enter a descriptive category name (e.g., “Web Development”)
    • Status: Choose Active to display it publicly
    • Serial Number: Assign a numeric order (lower numbers appear first)
  4. Click Submit

Note: The serial number controls display order—not alphabetical sorting. Use consistent intervals (e.g., 10, 20, 30) to allow future insertions.

Path 2: Editing an Existing Portfolio Category

  1. On the Portfolio Categories page, locate the target row in the table
  2. Click the Edit button in the Actions column
  3. The modal will auto-fill with current values
  4. Modify any field as needed (name, status, serial number)
  5. Click Save Changes

Note: Changing a category’s status to Deactive hides all associated portfolios from public view but retains them in the database.


Step 3: Creating a Portfolio Item

Portfolio items represent individual case studies or projects. Each supports rich media, metadata, and client details.

Path 1: Adding a New Portfolio Entry

  1. Navigate to Portfolio > Portfolios in the sidebar
  2. Click Add Portfolio (top-right)
  3. Complete the multi-section form:

Media Section

  • Thumbnail: Upload a featured image (JPG/PNG, recommended 800×600px)
  • Slider Images: Use the Dropzone area to upload multiple high-res images for the project gallery

Basic Information

  • Language: Select the content language
  • Title: Enter a clear, SEO-friendly project title
  • Category: Choose from active portfolio categories
  • Serial Number: Set display priority (e.g., 100 for early display)

Project Details

  • Status: Mark as Completed or In Progress
  • Client Name: Optional but recommended for credibility
  • Start Date / Submission Date: Use date pickers for accurate timelines
  • Website Link: Add live URL if applicable

Content & SEO

  • Content: Use the WYSIWYG editor (Summernote) to describe the project
  • Meta Keywords: Enter comma-separated keywords (e.g., “UI design, React, Figma”)
  • Meta Description: Write a 120–160 character summary for search engines
  1. Click Submit

Note: All fields marked with ** are required. Slider images must be JPG, JPEG, or PNG and under 2MB each.


Step 4: Editing an Existing Portfolio Item

Path 1: Updating Portfolio Content and Metadata

  1. Go to Portfolio > Portfolios
  2. Find the desired entry and click the Edit icon (pencil) in the Actions column
  3. The edit page loads with all fields pre-populated
  4. You may:
    • Replace the thumbnail or add/remove slider images
    • Update title, category, dates, or client info
    • Revise content using the embedded editor
    • Adjust SEO metadata
  5. Scroll to the bottom and click Update

Note: At least one slider image must remain—the system prevents deletion below this threshold to ensure frontend integrity.

Guest Experience – Viewing Portfolios

1 Portfolio Homepage (Listing Page)

When guests visit your Portfolios page, they see a professional gallery of your best work.

Page Layout:

  • Breadcrumb: “Home > Our Projects” navigation path
  • Category Filters: Buttons at top (“All”, “portfolio1”, etc.) for instant filtering
  • Project Grid: Cards showing portfolio items.
  • Project Card Shows:
    • Featured image (thumbnail)
    • Project title
    • Category tag
    • Smooth hover animation

How Guests Browse:

  1. Click “Portfolios” in main menu
  2. (Optional) Filter by category using top buttons:
    • “All”: Shows every project
    • Category name: Shows only matching projects
  3. Click any project card to view full details

2 Portfolio Detail Page – What Guests See

When a guest clicks a portfolio item, they see a rich, immersive project showcase:

SectionContentPurpose
Breadcrumb“Home > Portfolio Details”Easy navigation back
Image GalleryMultiple high-quality images with lightbox popupView enlarged images in modal window
Project TitleLarge heading (e.g., “Jone Doe”)Clear project identification
Project Details SidebarStructured information:
– Category
– Client Name
– Start/End Dates
– Website Link (clickable)
Quick reference of key facts
Full DescriptionRich text content with headings, paragraphs, listsTells the project story professionally
Social SharingFacebook, Twitter, LinkedIn buttonsShare project with others

Key Features Guests Experience:

  • Lightbox Gallery: Click any image to view full-screen with navigation arrows
  • Mobile-Optimized: Layout adapts perfectly to phones/tablets
  • Easy Sharing: One-click sharing to social media
  • Professional Presentation: Clean layout that builds trust

3 Step-by-Step Guest Journey

Step 1: Discover Portfolios

  • Guest clicks “Portfolios” in main menu
  • Sees visually appealing grid of your best work
  • What they gain: Immediate visual proof of your hotel’s quality

Step 2: Filter Projects (Optional)

  • Clicks category filter (e.g., “Wedding Events”)
  • Sees only relevant projects instantly
  • What they gain: Saves time finding what matters to them

Step 3: View Project Details

  • Clicks a project that catches their eye
  • Sees beautiful image gallery with lightbox functionality
  • Reads professional description with project timeline
  • Checks client name and website for credibility
  • What they gain: Confidence in your capabilities through real examples

Step 4: Share or Take Action

  • Shares project on social media
  • Clicks client’s website link (sees real results)
  • What they gain: Social validation and inspiration to book

Business Themes

How to create Landing Page in less than one hour

SITE.devad.io is the simplest Landing page builder, yet the cheapest ever. With its rich features, no feature is limited.

Step 1: Choose Theme and Main Website Details

https://site.devad.io/user/create-card?type=business

1- Choose from more than 50 landing page designs
2- Choose language and page link name
3- Choose the hero section (cover, logo, Title, and description)

Chrome Kjgxkrj7g5

1- Add your contact info (phone, email, WhatsApp, etc.)
2- Add your social media accounts
3- Add youtube videos section, embadeed drive videos/images/docs, Google map, Address, Text, Google reviews, and many more

Step 3: Add Your Services

site devadio services

1- Add Service Image
2- Add Service Name and Description
3- Optionally, enable Enquiry Button

Step 4: Add Your Products

Site.devad .io Add Product

1- Add product main info (name, description, image)
2- Add Sale Price, Regular Price, Currency, and Badge

Site.devad .io Gallery

1- Upload your image gallery
2- Add captions to images

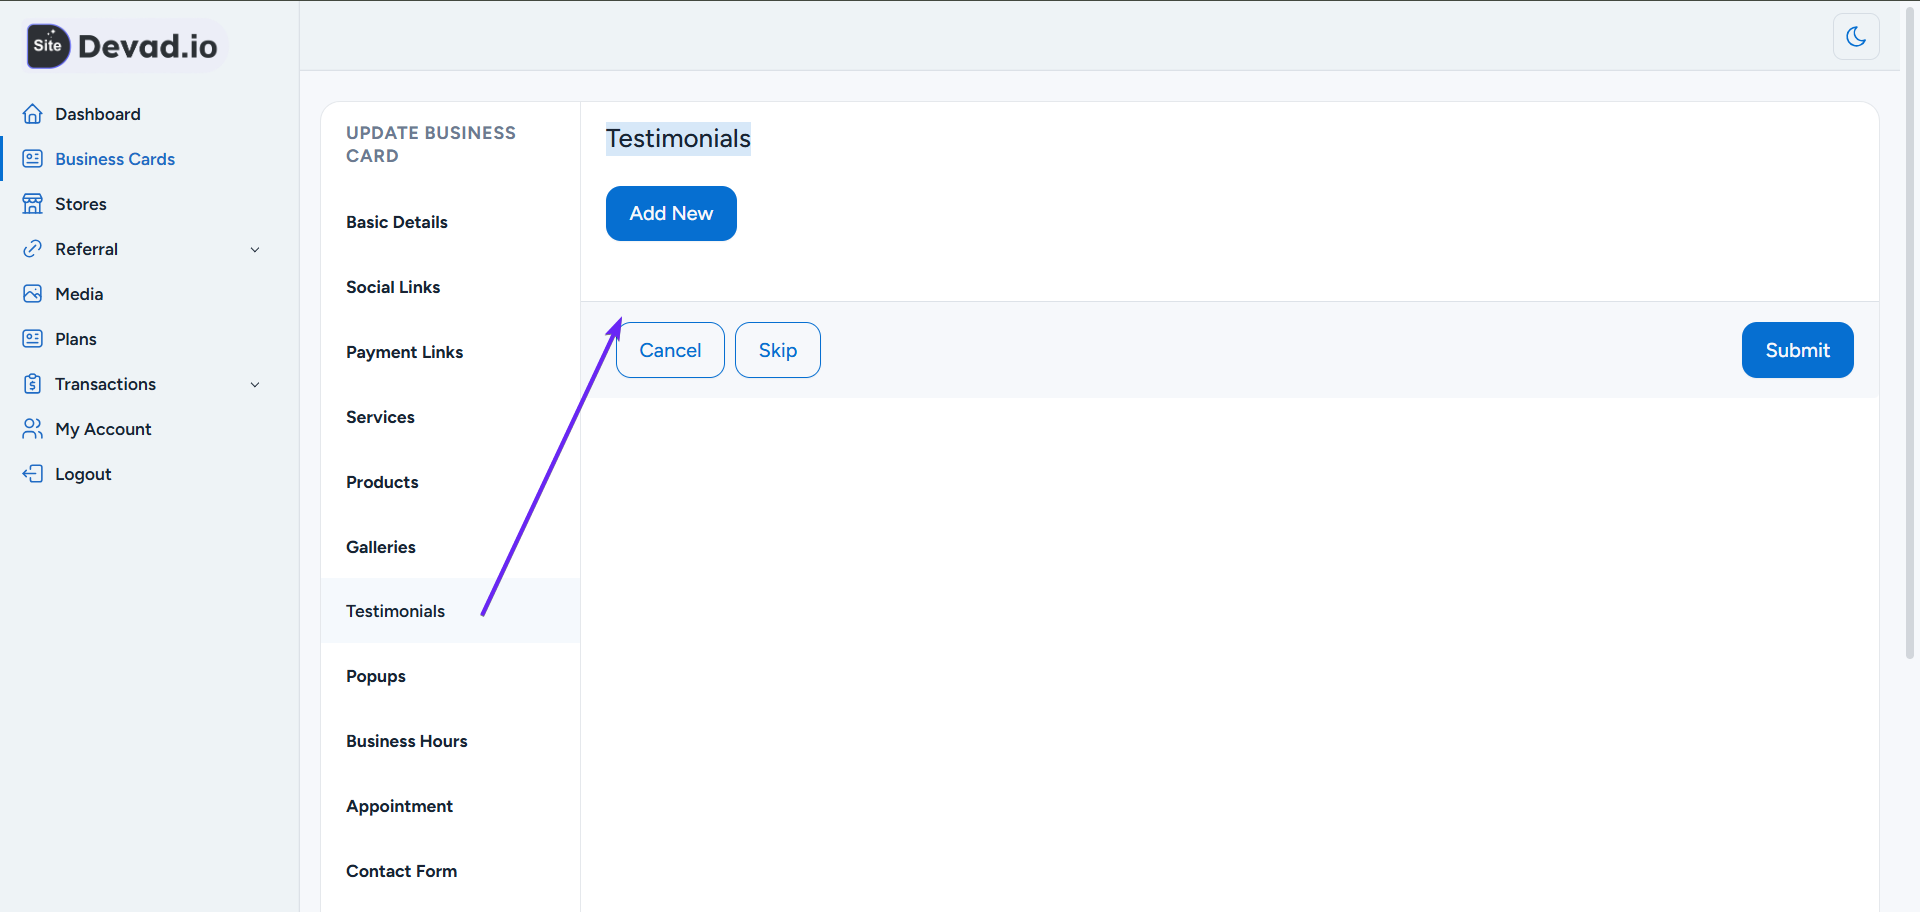
Step 6: Add Customer Reviews and Testimonials

Chrome D9qo59f1oq

1- Add Reviewer Image and Reviewer Name
2- Add Reviewer Text and Subtext

Step 7: Add Popups

Enable Information Popup

1- Enable Newsletter Popup (optional)
2- Enable Information Popup which is good for promotions and discounts

Step 8: Add Business Hours / Working Hours

Step 8: add Business Hours/ working hours

1- Add your working hours. You can hide them
2- Choose hours and set if closed or open

Step 9: Set Appointment Timings

Site.devad .io Step 9 Set Appointment Timings

1- Slot duration max 60 (we can increase it, just contact us)
2- Set hour and week of availability

Step 10: Add Contact & Inquiry Form

Contact & Inquiry Form

1- Enable or Hide Contact / Inquiry Form
2- Add your Email address to receive booking notifications

Step 11: Service Booking

Service Booking

1- Add Basic Configuration (Available days: Sunday, Monday, etc.)
2- Add your Start and End time
3- Add your Email address to receive booking notifications

Step 12: Set Advanced Settings

Site.devad .io Seo

1- Set Password Protection to allow only people with a password to access your page
2- Enable PWA to turn your website into a mobile app
3- Enable or disable other Language Switcher
4- Add SEO Configuration Settings
5- Add Custom CSS to customize your website. Add JS like analytics and pixels for conversion tracking

Step 13: Customize Section Titles

Chrome 2soxshidfu

1- You can change section names according to your business
e.g., Products to Books, Services to Courses, or Testimonials to Reviews, etc.

Step 14: Connect to Your Domain or Subdomain

Site.devad .io Set Custom Domain

1- From page actions, click Connect
2- For our free subdomain: Only add your desired subdomain name + mufidx.net (e.g., storez.mufidx.net). If the subdomain is available, we will approve it ASAP.
2- For your own domain, please follow the instructions.

💡
If you face any problem, just take a screenshot of the issue you’re facing and contact us to help you.
💪
We offer creating your landing page at a very small cost. Contact us!

Business Page Templates


Don’t just imagine your online presence—experience it. Dive into our library of professionally designed, mobile-responsive templates tailored to get your business online in minutes. Preview our live examples to see the smooth animations and user-friendly layouts that make SITE.devad.io the ultimate no-code solution.

Cheapest Landing pages: Page Price is only 1$ , We offer building & deliver the page desing wihtin 1-2 days for small fee. this offer is very limited and might expire soon!
Stunning Templates: Choose from 50+ designs, customize hero sections, and add your own branding in minutes.
Custom Domain & PWA: Connect your own domain easily and turn your website into a mobile app.
Services & Products: Showcase your work with galleries, list products with prices, or enable service enquiries.
Smart Booking: Set business hours, slot durations, and receive instant email notifications for appointments.
Marketing Tools: Boost conversions with promotional popups, customer reviews, SEO settings, and social media integration.

Instagram Landing Page


Youtube Influencer Page


Tiktoker Influencer Page


Course & Teacher Page


Studio & Photograper Page

Explore More theme

Since we have an extensive collection of over 50 themes, we can’t feature them all here. To see everything we have to offer, please visit our platform.

Store Themes

How to create Online Store in less than one hour

SITE.devad.io is the simplest Online Store builder, yet the cheapest ever. With its rich features, no feature is limited.

Step 1: Choose Theme and Main Store Details

Site.devad .io Step 1 Choose Theme And Main Store Details

1- Choose your store theme from 20+ WhatsApp Store themes
2- Choose the primary language for the store
3- Upload the Banner for the store
4- Upload the store logo
5- Enter the Brand name of your store
6- Type the SEO/Personalized Link
7- Add the Store greeting (e.g., new offer or free shipping)
8- Add your store Currency
9- Set the Country Code for WhatsApp
10- Add your store WhatsApp Number to receive your orders
11- Add WhatsApp Footer Text

Step 2: Add the Category for Your Products

Site.devad .io Step 2 Add The Category For Your Products

1- Add your category Thumbnail / small image
2- Type the category name

Step 3: Add Your Services

Site.devad .io Step 3 Add Your Products 1

1- Choose the product category
2- Type product badge (e.g., Best Selling, Free Shipping)
3- Upload product images. We recommend using a Compression Tool like Squoosh.app to make your store faster
4- Type your product name
5- Add product short description
6- Add product full description. We recommend using bullets and short sentences
7- Add Regular Price
8- Add Sales Price
9- Set Status to ‘In Stock’ to allow purchase. Set ‘Out of Stock’ to disable ordering

💡
You can use an Excel sheet in CSV format to upload bulk products all at once.

Example of CSV table:

product_imageproduct_nameproduct_short_descriptionproduct_descriptionregular_pricesales_priceproduct_statusstatus
storage/images/68cdc15eab81d-69132f7e9586d.pngFishfree shipping

fresh and high quality

3520instock1

Step 4: Manage Orders

Site.devad .io Step 4 Manage Orderss

1- View order details and status
2- Check the invoice details with the option to print or download
3- Update Order Status
4- Update Payment Status

Step 4: Manage SEO Settings

Seo Configuration Settings

1- Add Favicon, which is your store logo (It appears in the browser tab, next to the site title in bookmarks, and beside the URL on Google Search results pages.)
2- Add Meta Title (appears as the main clickable blue headline on the Google search results page and in the browser tab title)
3- Add Meta Description (compelling and keyword-rich, about 150 – 160 characters)
4- Add Meta Keywords as a comma-separated list (e.g., Dubai store, Dubai shop, Dubai online store)

Step 5: Add Your Store Business Hours / Working Hours

Site.devad .io Step 5 Add Your Store Business Hours Working Hours

Add the working hours to let customers know your business availability.

Step 6: Manage Popups

Manage Popups

1- Optionally, enable Newsletter Popup
2- Optionally, enable Information Popup
3- Activate the confetti effect
4- Add rectangle logo and title
5- Add a short description to the popup
6- Add the Button Text and link (you can use a product link or WhatsApp link)

Chrome 4mzxgshkfb
Popup examples

Step 7: Advanced Settings

Advanced Settings

1- Enable PWA (Allows users to easily install your website onto their device’s home screen, just like a native app)
2- Enable Language Switcher to allow a multi-lingual store
3- Customize your store frontend via the Custom CSS section
4- Add Custom JS like Pixel or Google Analytics.

Pwa Popup
PWA Popup

Step 8: Add Store Policies

Store Policies

Add policies: Privacy Policy, Terms and Conditions, Return/Refund Policy, Shipping Policy, Cookie Policy, Contact Information / Customer Support Policy

Step 9: Settings

Store Saettings

1- Choose Delivery Options: Delivery, Dine-in, Takeaway
2- Set invoice prefix

Step 10: Connect to Your Domain or Subdomain

Site.devad .io Set Custom Domain

1- From page actions, click Connect.
2- For our free subdomain: Only add your desired subdomain name + mufidx.net (e.g., storez.mufidx.net). If the subdomain is available, we will approve it ASAP.
2- For your own domain, please follow the instructions below.

💡
if you face any problem, just take a screenshot ot the issue you’are facing and contact us to help you
💪
We offer creating your landing page with very small cost. contact us!